

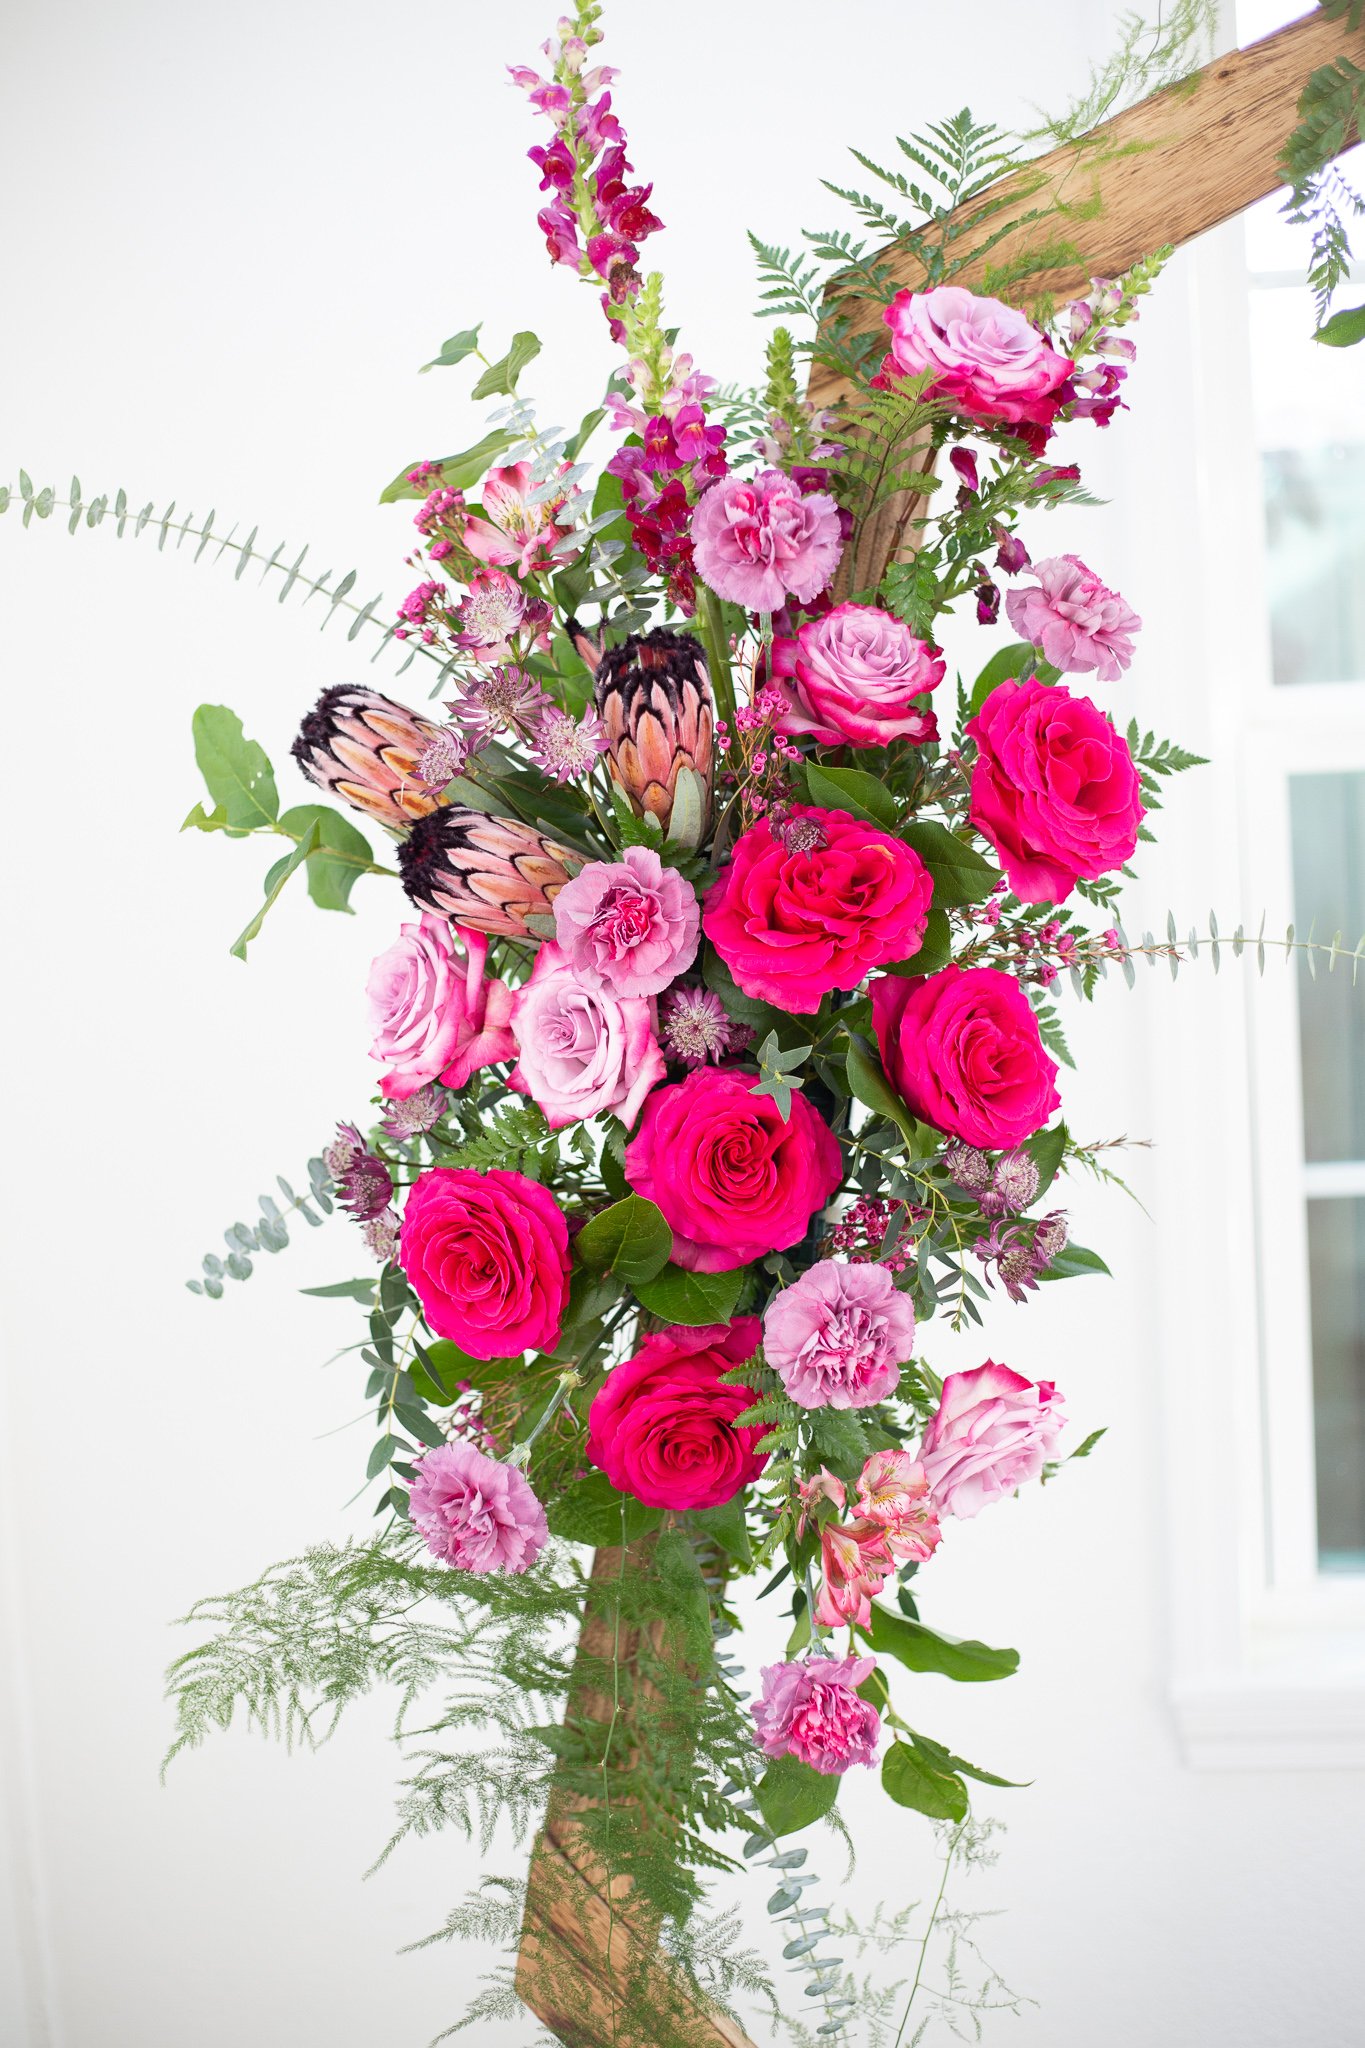
Hexagon
We’ve all seen them and I don’t think they are going away any time soon. The GORGEOUS modern take on a wedding arch by adding in some geometry with a hexagon! Check out the new DIY Hex Arch for your ceremony by Alison Fleck of Bloom Culture Flowers
There are so many ways to decorate this type of arch/backdrop so we we’vbe broken it down by number of arrangements, their size, and their cost. That way you can truly decide what works best for your wedding/event and most importantly, your budget!
Supplies:
One or all of these (mix and match to your liking)
-
One large floral foam cage
-
One medium floral foam cage
-
2 Grand Iglu foam cages
-
Floral Snips
-
10-14” Zip Ties
Flowers Used:


Floral Recipes:
Large side arrangement: $215
-
Greenery:
-
5-6 Stems Leather Leaf
-
6-8 Stems Salal
-
4-6 Stems Gunni Eucalyptus
-
5-6 Stems Baby Blue Eucalyptus
-
-
Flowers:
-
3 Protea
-
6 Fuchsia Roses
-
5 Deep Purple Roses
-
3-4 Burgundy Snap Dragons
-
6 Minerva Carnations
-
2-3 Alstroemeria
-
2-3 Astrantia
-
4-6 Sprays of Wax Flower
-

Medium Lower Arrangement: $175
-
Greenery:
-
3-5 Stems Leather Leaf
-
3-5 Stems Salal
-
2-4 Stems Gunni Eucalyptus
-
3 Stems Baby Blue Eucalyptus
-
-
Flowers:
-
4 Antique Hydrangea
-
3 Fuchsia Roses
-
4 Deep Purple Roses
-
2 Burgundy SnapDragons
-
5 Minerva Carnations
-
2 Alstroemeria
-
2-3 Astrantia
-
4-5 Sprays of Wax Flower
-

Very top arrangement $55
-
Greenery:
-
2-3 Stems Leather Leaf
-
3-4 Stems Salal
-
2 Stems Gunni Eucalyptus
-
2 Stems Baby Blue Eucalyptus
-
-
Flowers:
-
3 Fuchsia Roses
-
2 Deep Purple Roses
-
3 Minerva Carnations
-
2 Alstroemeria
-
4-5 Sprays of Wax Flower
-
Other top arrangement $55
-
Greenery:
-
2-3 Stems Leather Leaf
-
3-4 Stems Salal
-
2 Stems Gunni Eucalyptus
-
2 Stems Baby Blue Eucalyptus
-
-
Flowers:
-
2 Fuchsia Roses
-
2 Deep Purple Roses
-
4 Minerva Carnations
-
2 Alstroemeria
-
4-5 Sprays of Wax Flower
-

GREENERY
We always start with greenery!
-
For all arrangements you will want to start with longer pieces of greenery, here we’ve used Leather leaf. It’s great for length and fabulous for outdoor arbors because it’s really hardy, and can provide long reach.
-
I also break downt the stems to fill in the middle sections of the foam. (Here is a quick video on what I mean by “breaking down stems”, you can apply this to all greenery.) Remember to use different lengths and sizes here to help create depth. You don’t want to use the same size of greenery as it could end up looking too uniform and rigid.
Pro-tip: I always do a test run of my longer pieces of greenery by placing them in the area I want them to go before I cut them. Measure twice, cut once right? I do this so if that specific piece of greenery is too long, I can cut it or if it’s too short I can use a different piece.
-
Next I move on to a different greenery called Salal, this greenery has a different shade of green and a different leaf structure. The Leather Leaf provides length and the Salal provides surface area, meaning it’s broad leaves cover more are. I place the Salal in a similar fashion as I did the shorter stems of Leather Leaf. Placing them in and around the cage at varying lengths and sizes to build the foundation of the arrangement. There isn’t an exact math to this, just keep filling in until you think the Salal is evening dispersed throughout the foundation.
-
At the risk of sounding like a broken record, we do the exact same thing with the Gunni Eucalyptus. Working in layers with the greenery, layering in each variety as you go with the same approach.
-
Except for the Baby Blue Eucaly[tus, which is very linear and very rigid. I usually use this variety to add some reach, whimsy, texture, and a variety of color. I basically use this as an accent greenery not necessarily a foundational one. Here I've used it to add some dimension and reach. Use this sparingly and again, as an accent.

FLOWERS
I will go through this one by size of arrangement because I've focused on (shockingly enough) Focal Flowers in this design!
LARGE:
-
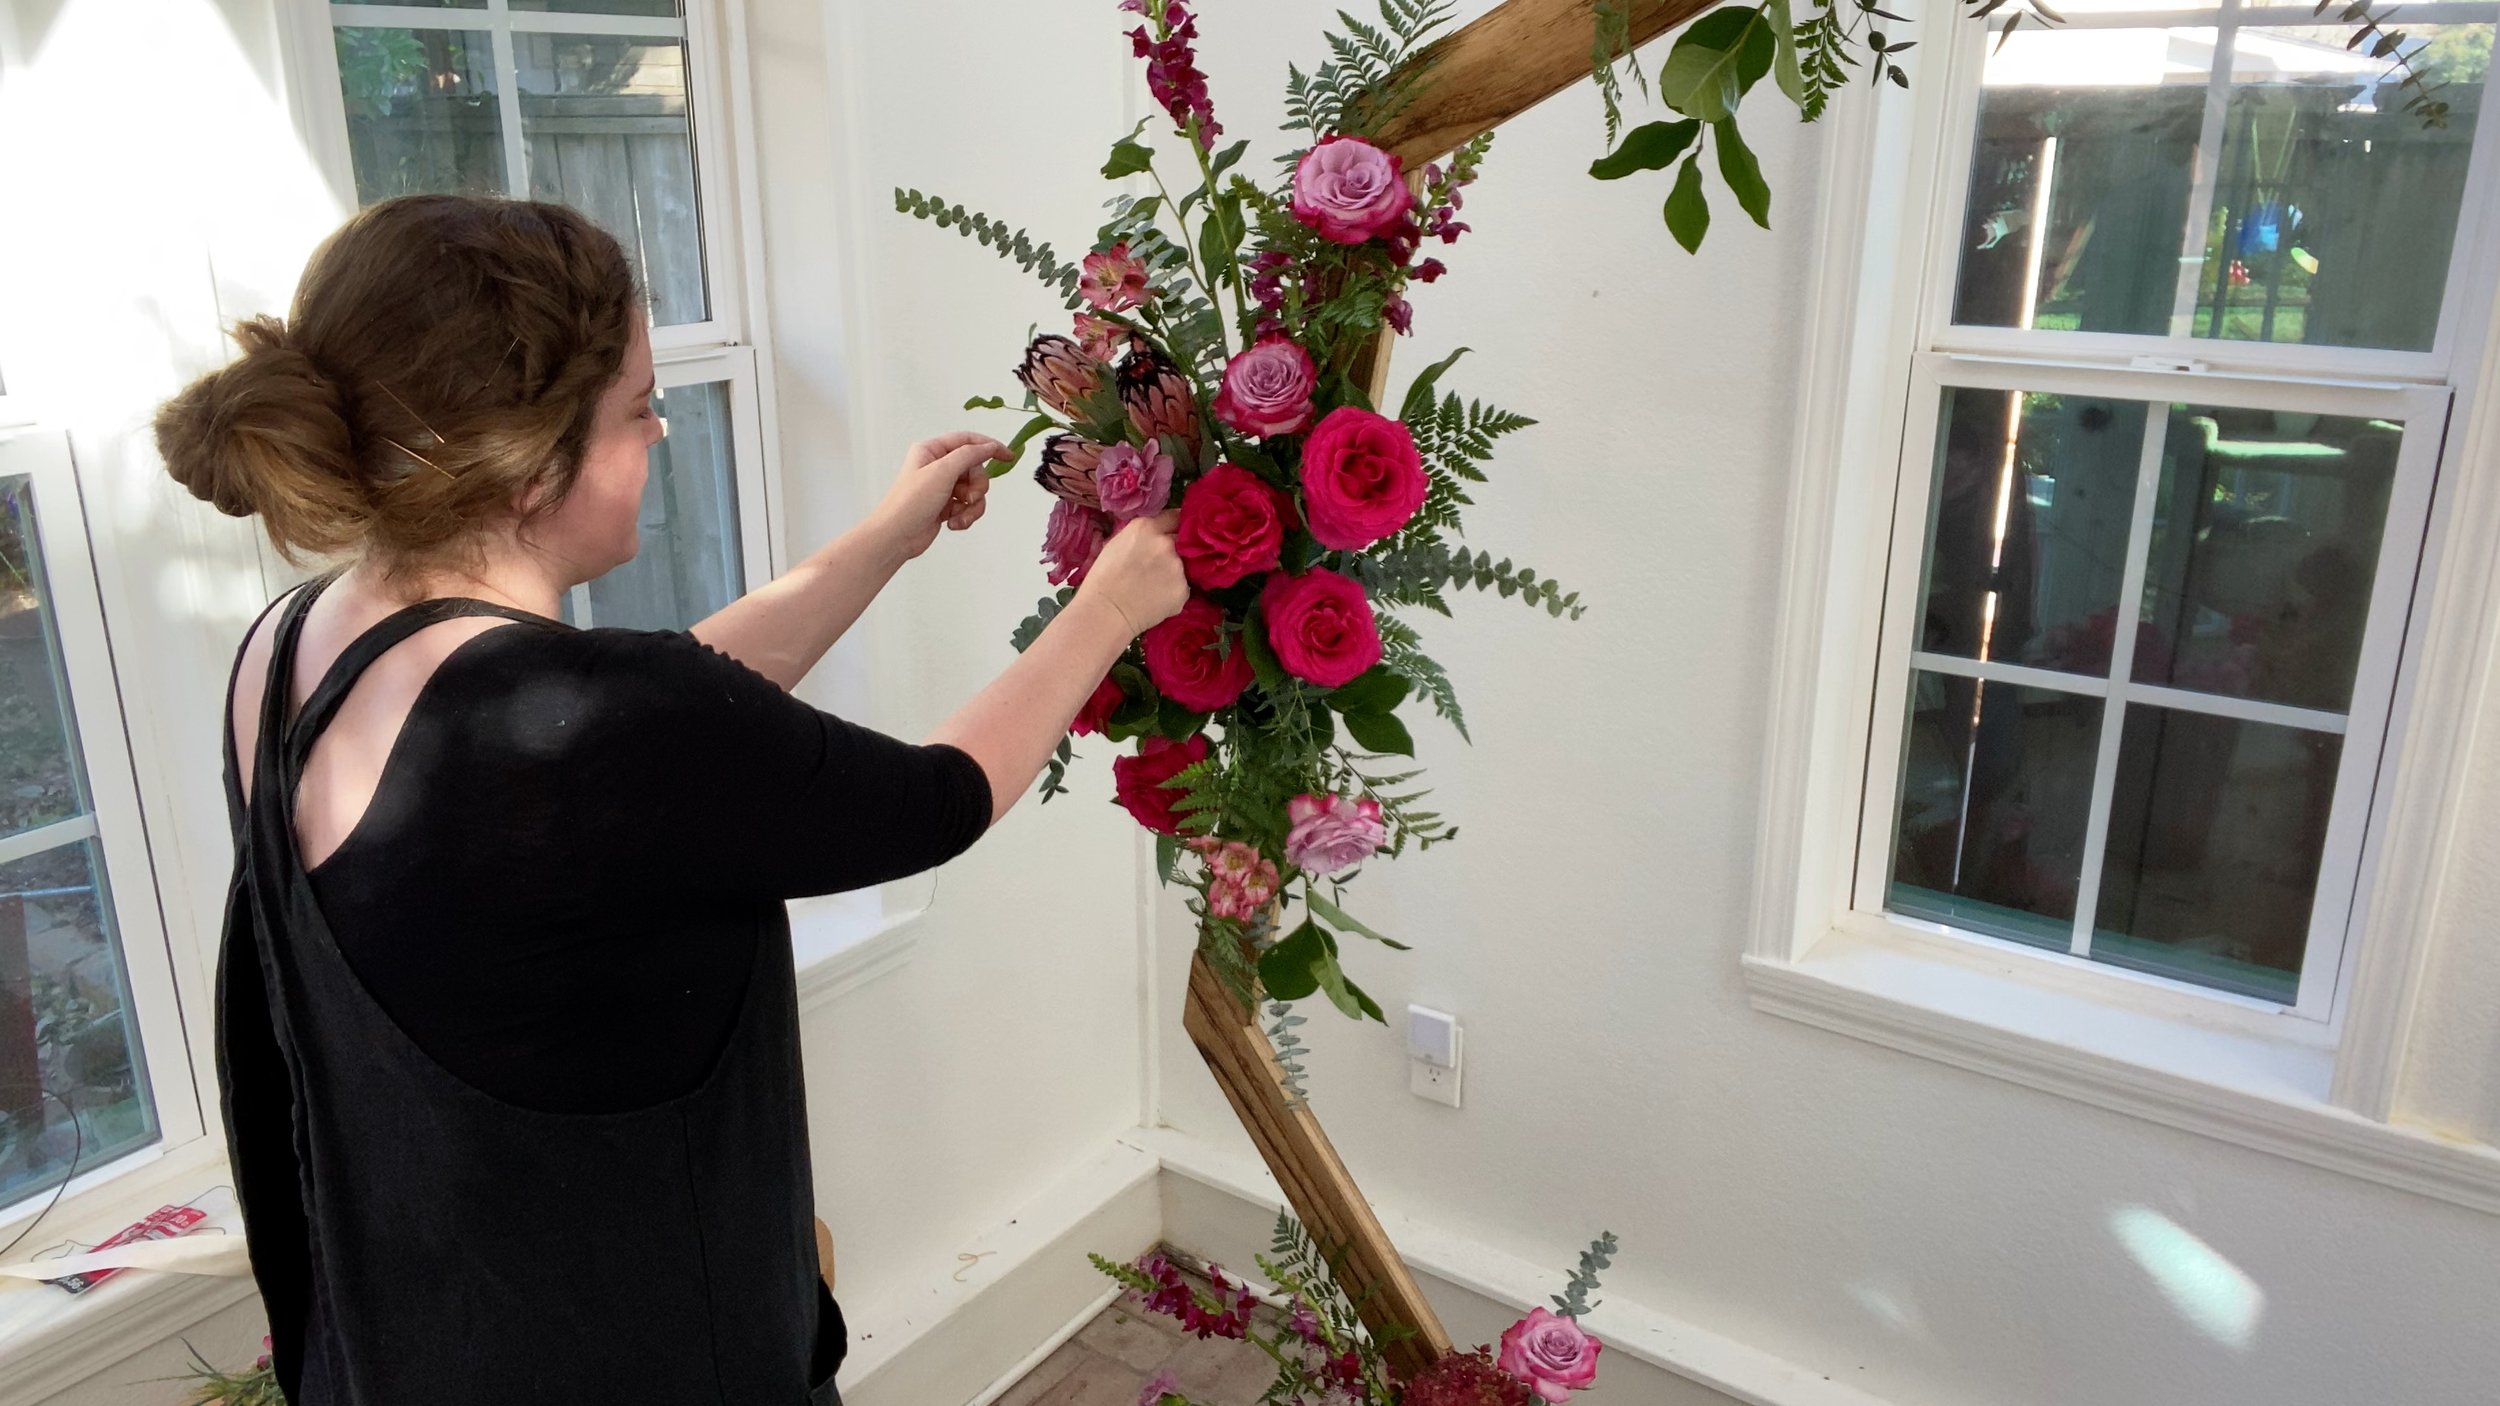
For the largest arrangement in the middle on the side of the hex, I decided to use the focal flower Protea. These can be rather large and their stems bulky so keeping the number we use low is a good idea. I’ve used three here and placed them first. I like to place my focal flowers first so it helps a) focus the design on them, and b) I've only used a few in this design and I wanted to make sure they were front and center.
-
I’m using two different rose varieties in this tutorial and first up is the fuchsia rose. I usually work in three’s. Meaning I place three flowers at a time in a loose grouping. In this design since I've already placed the Protea, I wanted to create a focus with this color as well and I focused this variety in a diagonal through the center working from the middle right to the lower/middle left. Placing the roses in different spots at varying stem lengths.
-
Next I place the Deep Purple roses and use my typical “rule of three’s” here as I place a grouping upper right and work my way down to the lower left. Again, no specific science here, just do what feels right on the placement and if three isn’t working, use two, or one!
-
Now I begin placing our spray flowers. Here I’ve used Alstroemeria which is a great flower not only for color but for longevity. They last a LONG time. With the sprays you can use the stem as it is or break down the sprays into smaller groupings.
-
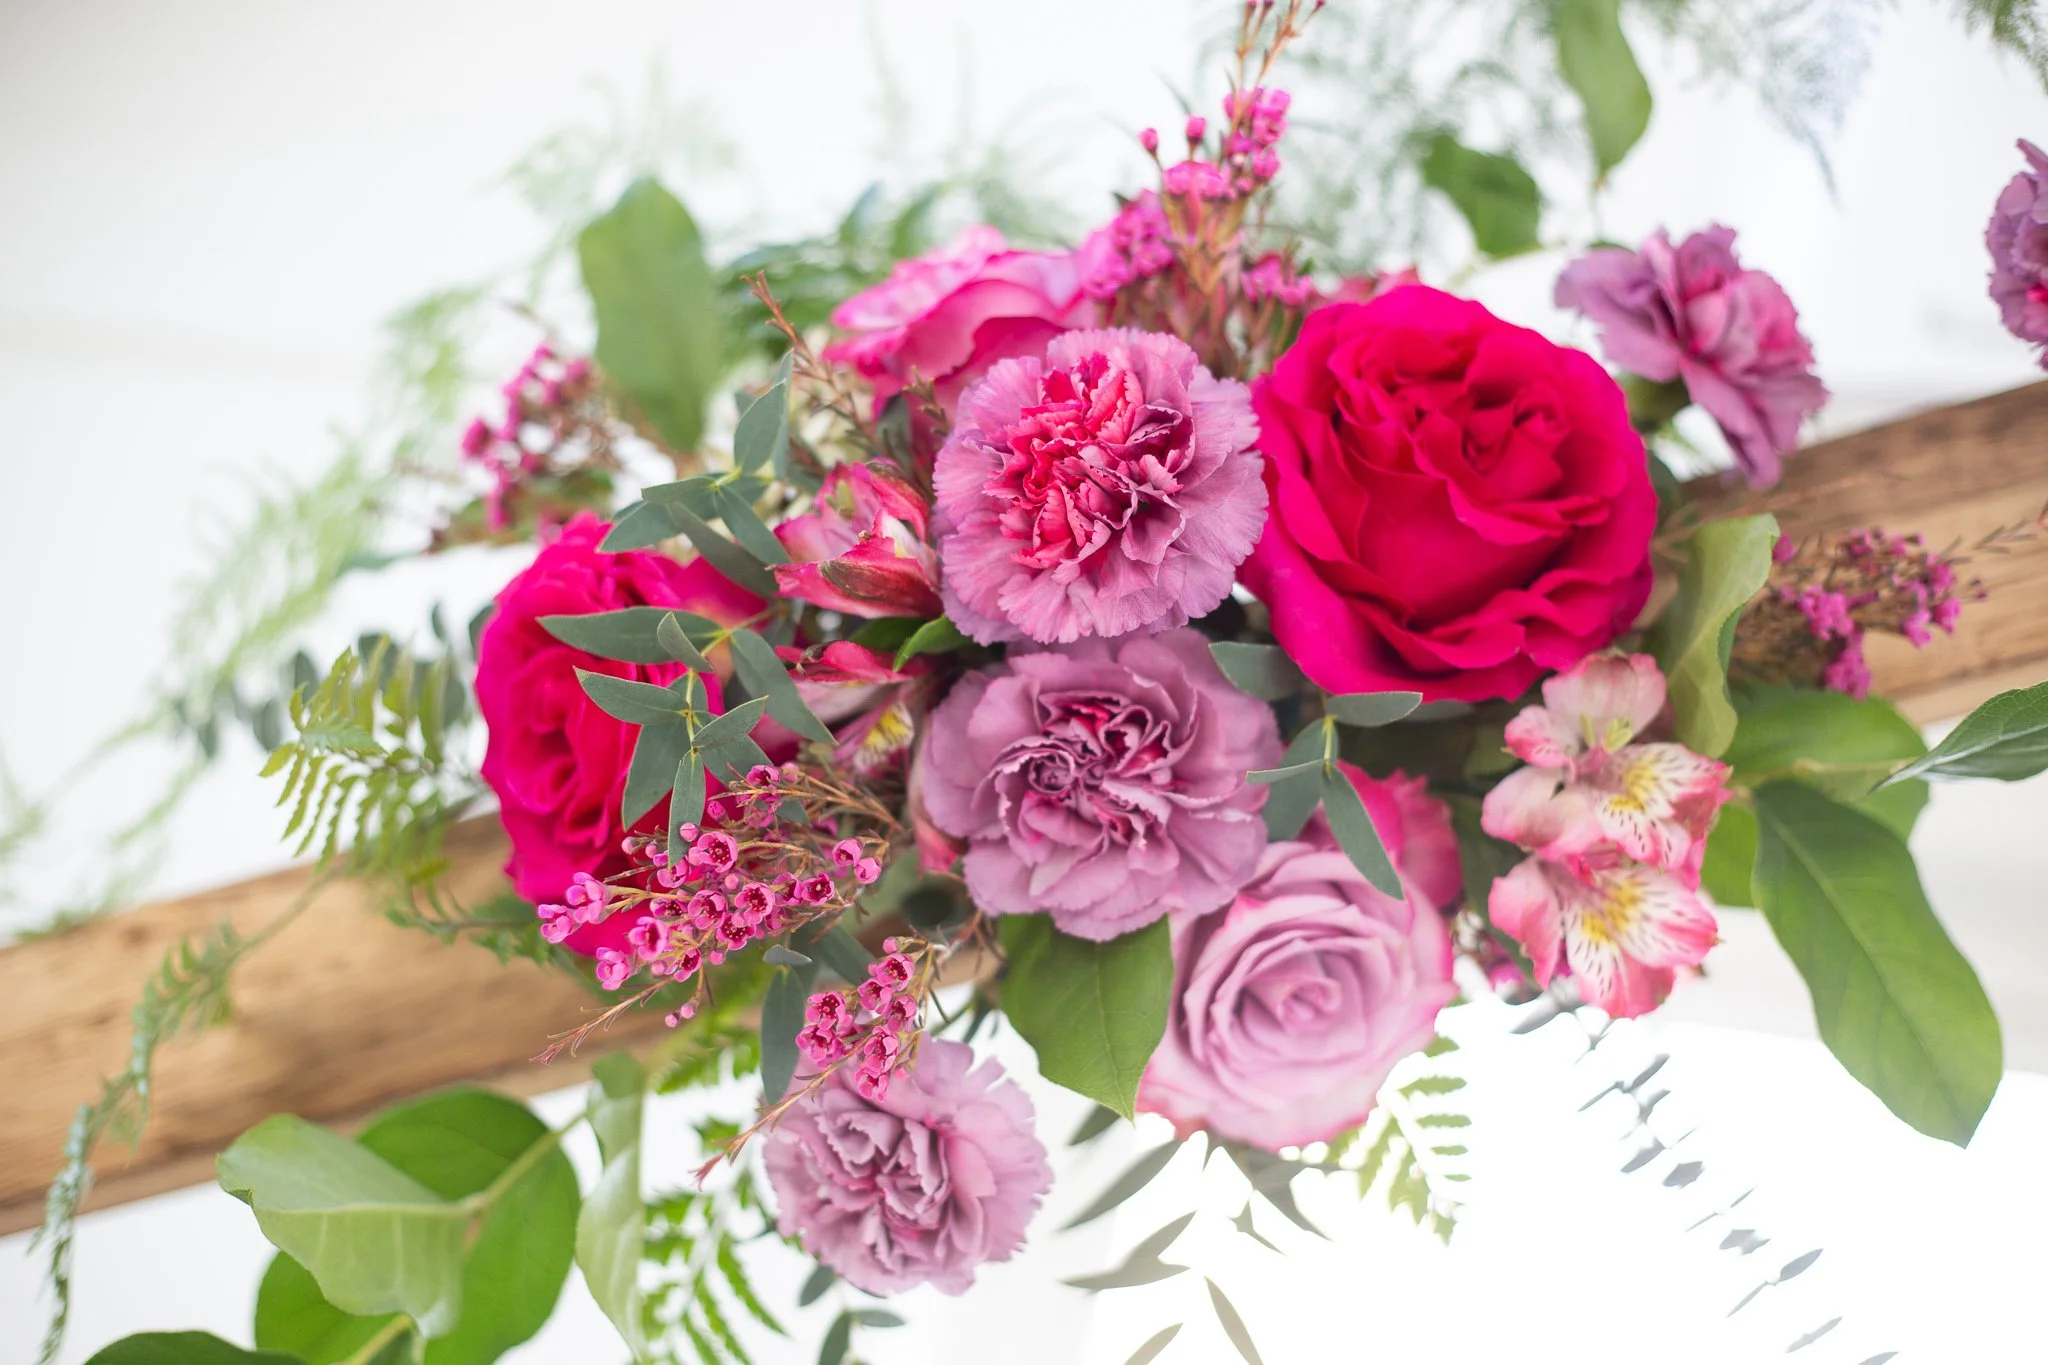
Next up is the gorgeous Minerva Carnations. They have an incredible variation of color. I treat these the same way as the roses. I *try to* work in three’s and vary the stem lengths.
-
After the carnations I place the Astrantia. It is also a spray but I use it more as an accent flower here due to the deep color and texture it provides. Again, in some places I use the whole stem and in some I break it down into smaller groupings.
-
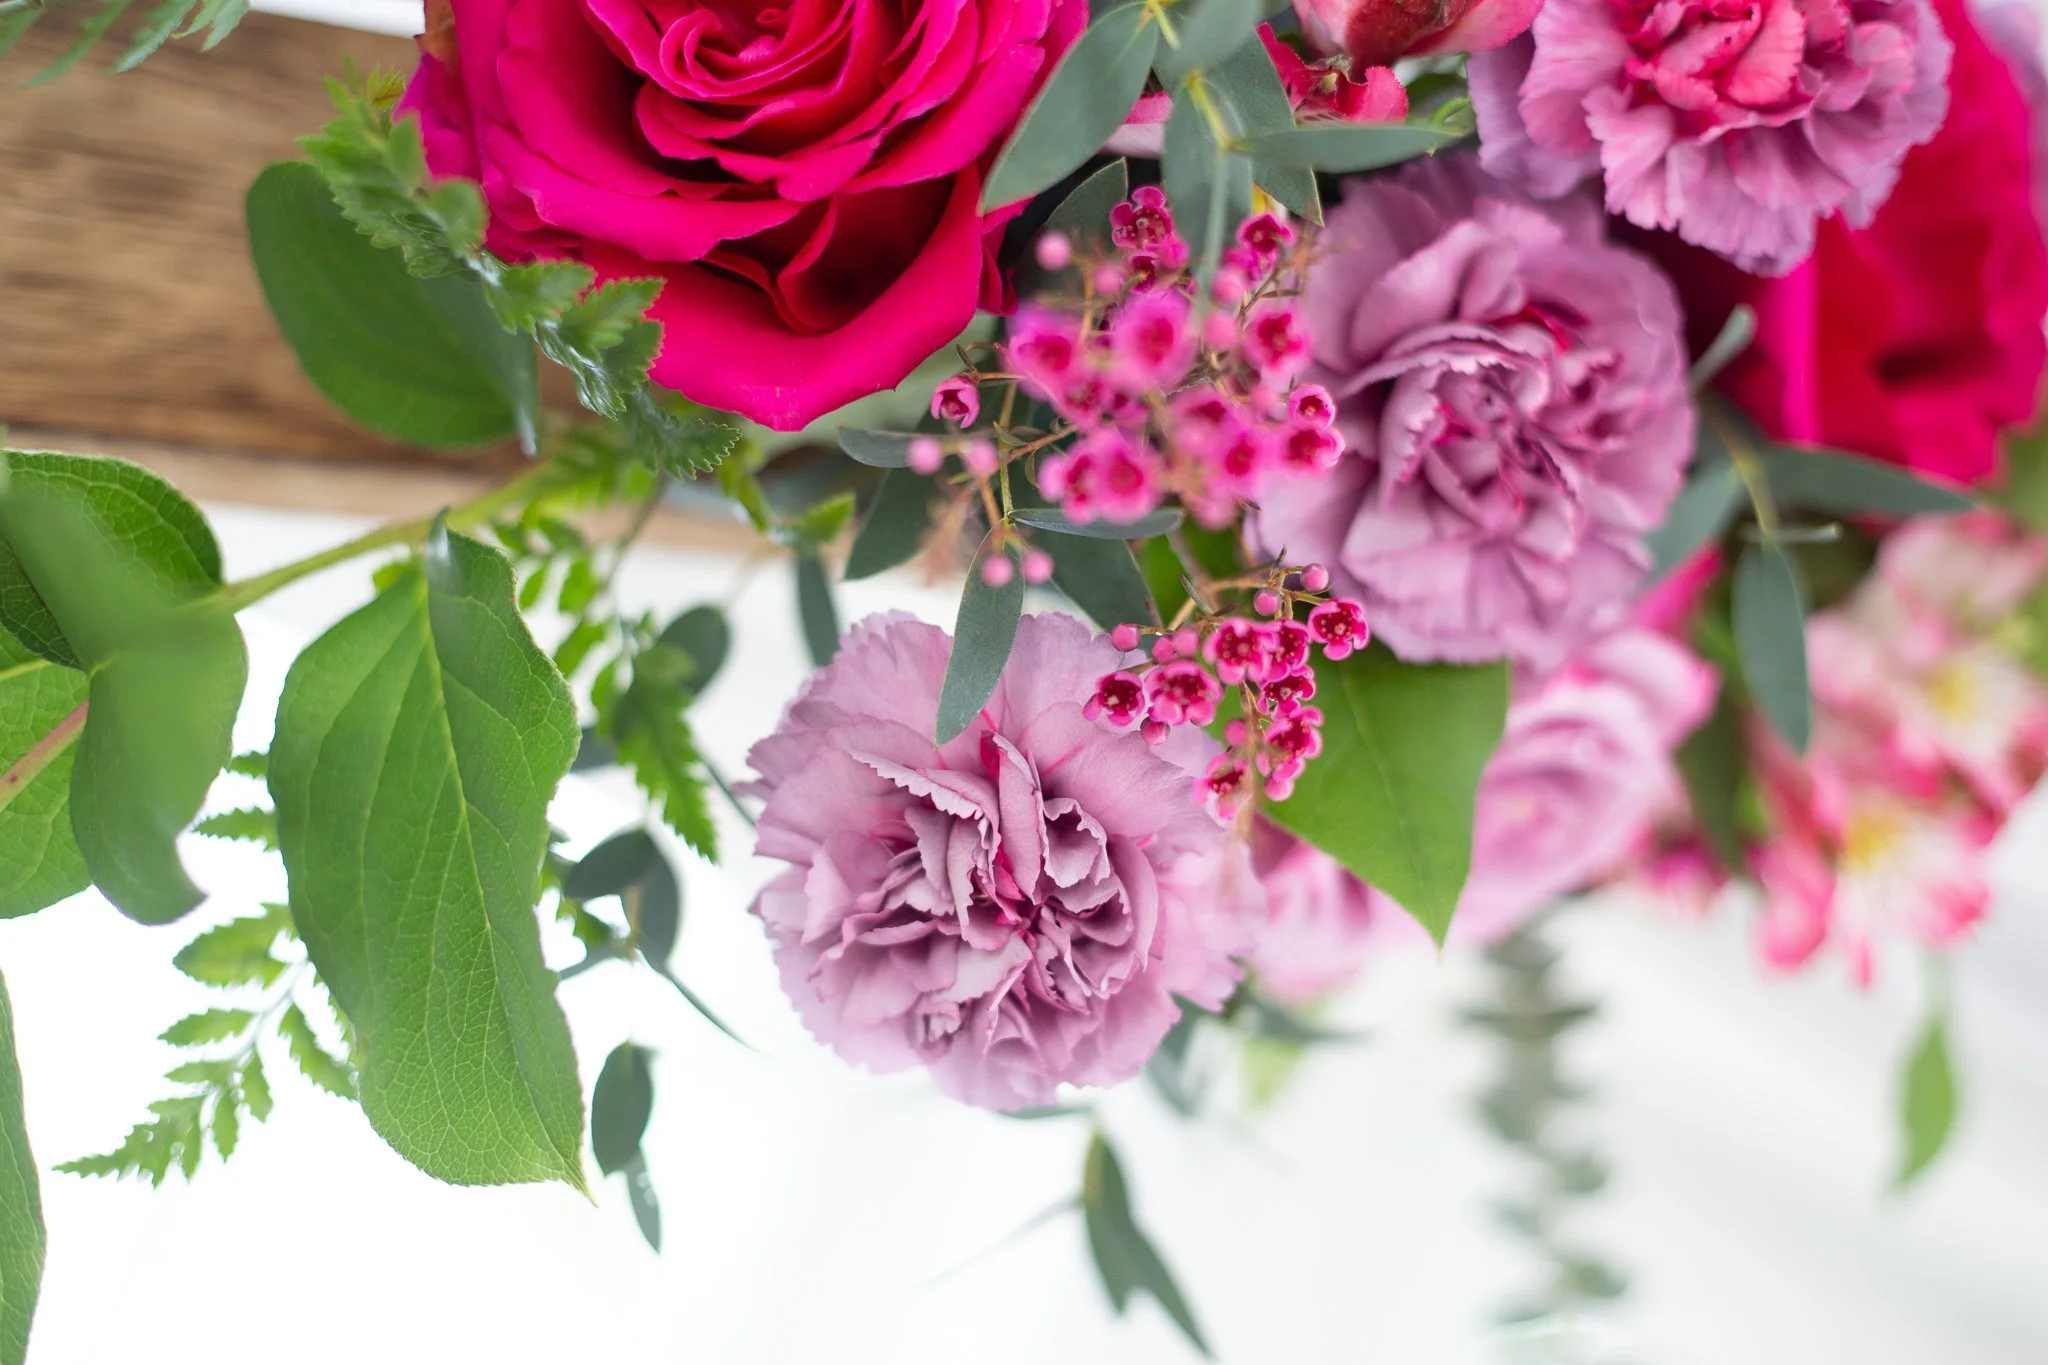
Lastly, we work in our filler flowers. Here we’ve used Wax Flower and use a few sprays to fill in spots that seem like they need another flower or to break up solid masses such as greenery or roses, etc.

MEDIUM:
-
For the lower/bottom medium sized arrangement on the hex, I’ve used the focal flower of some amazing antique hydrangeas from my own garden.I say these are a focal flower but they really function more like a base flower here. These cover an amazing amount of surface area and help you use less flowers. Place these in the foam to help cover the cage and you can move on to the roses.
-
Take the same approach with the roses and following flowers as we described in the large arrangement (no need to re-write the novel!). Take the same approach with the number of flowers in this recipe (listed above) and remember to *try to* work in three’s and ALWAYS vary your stem length!
-
Follow the steps from the Large Arrangement!
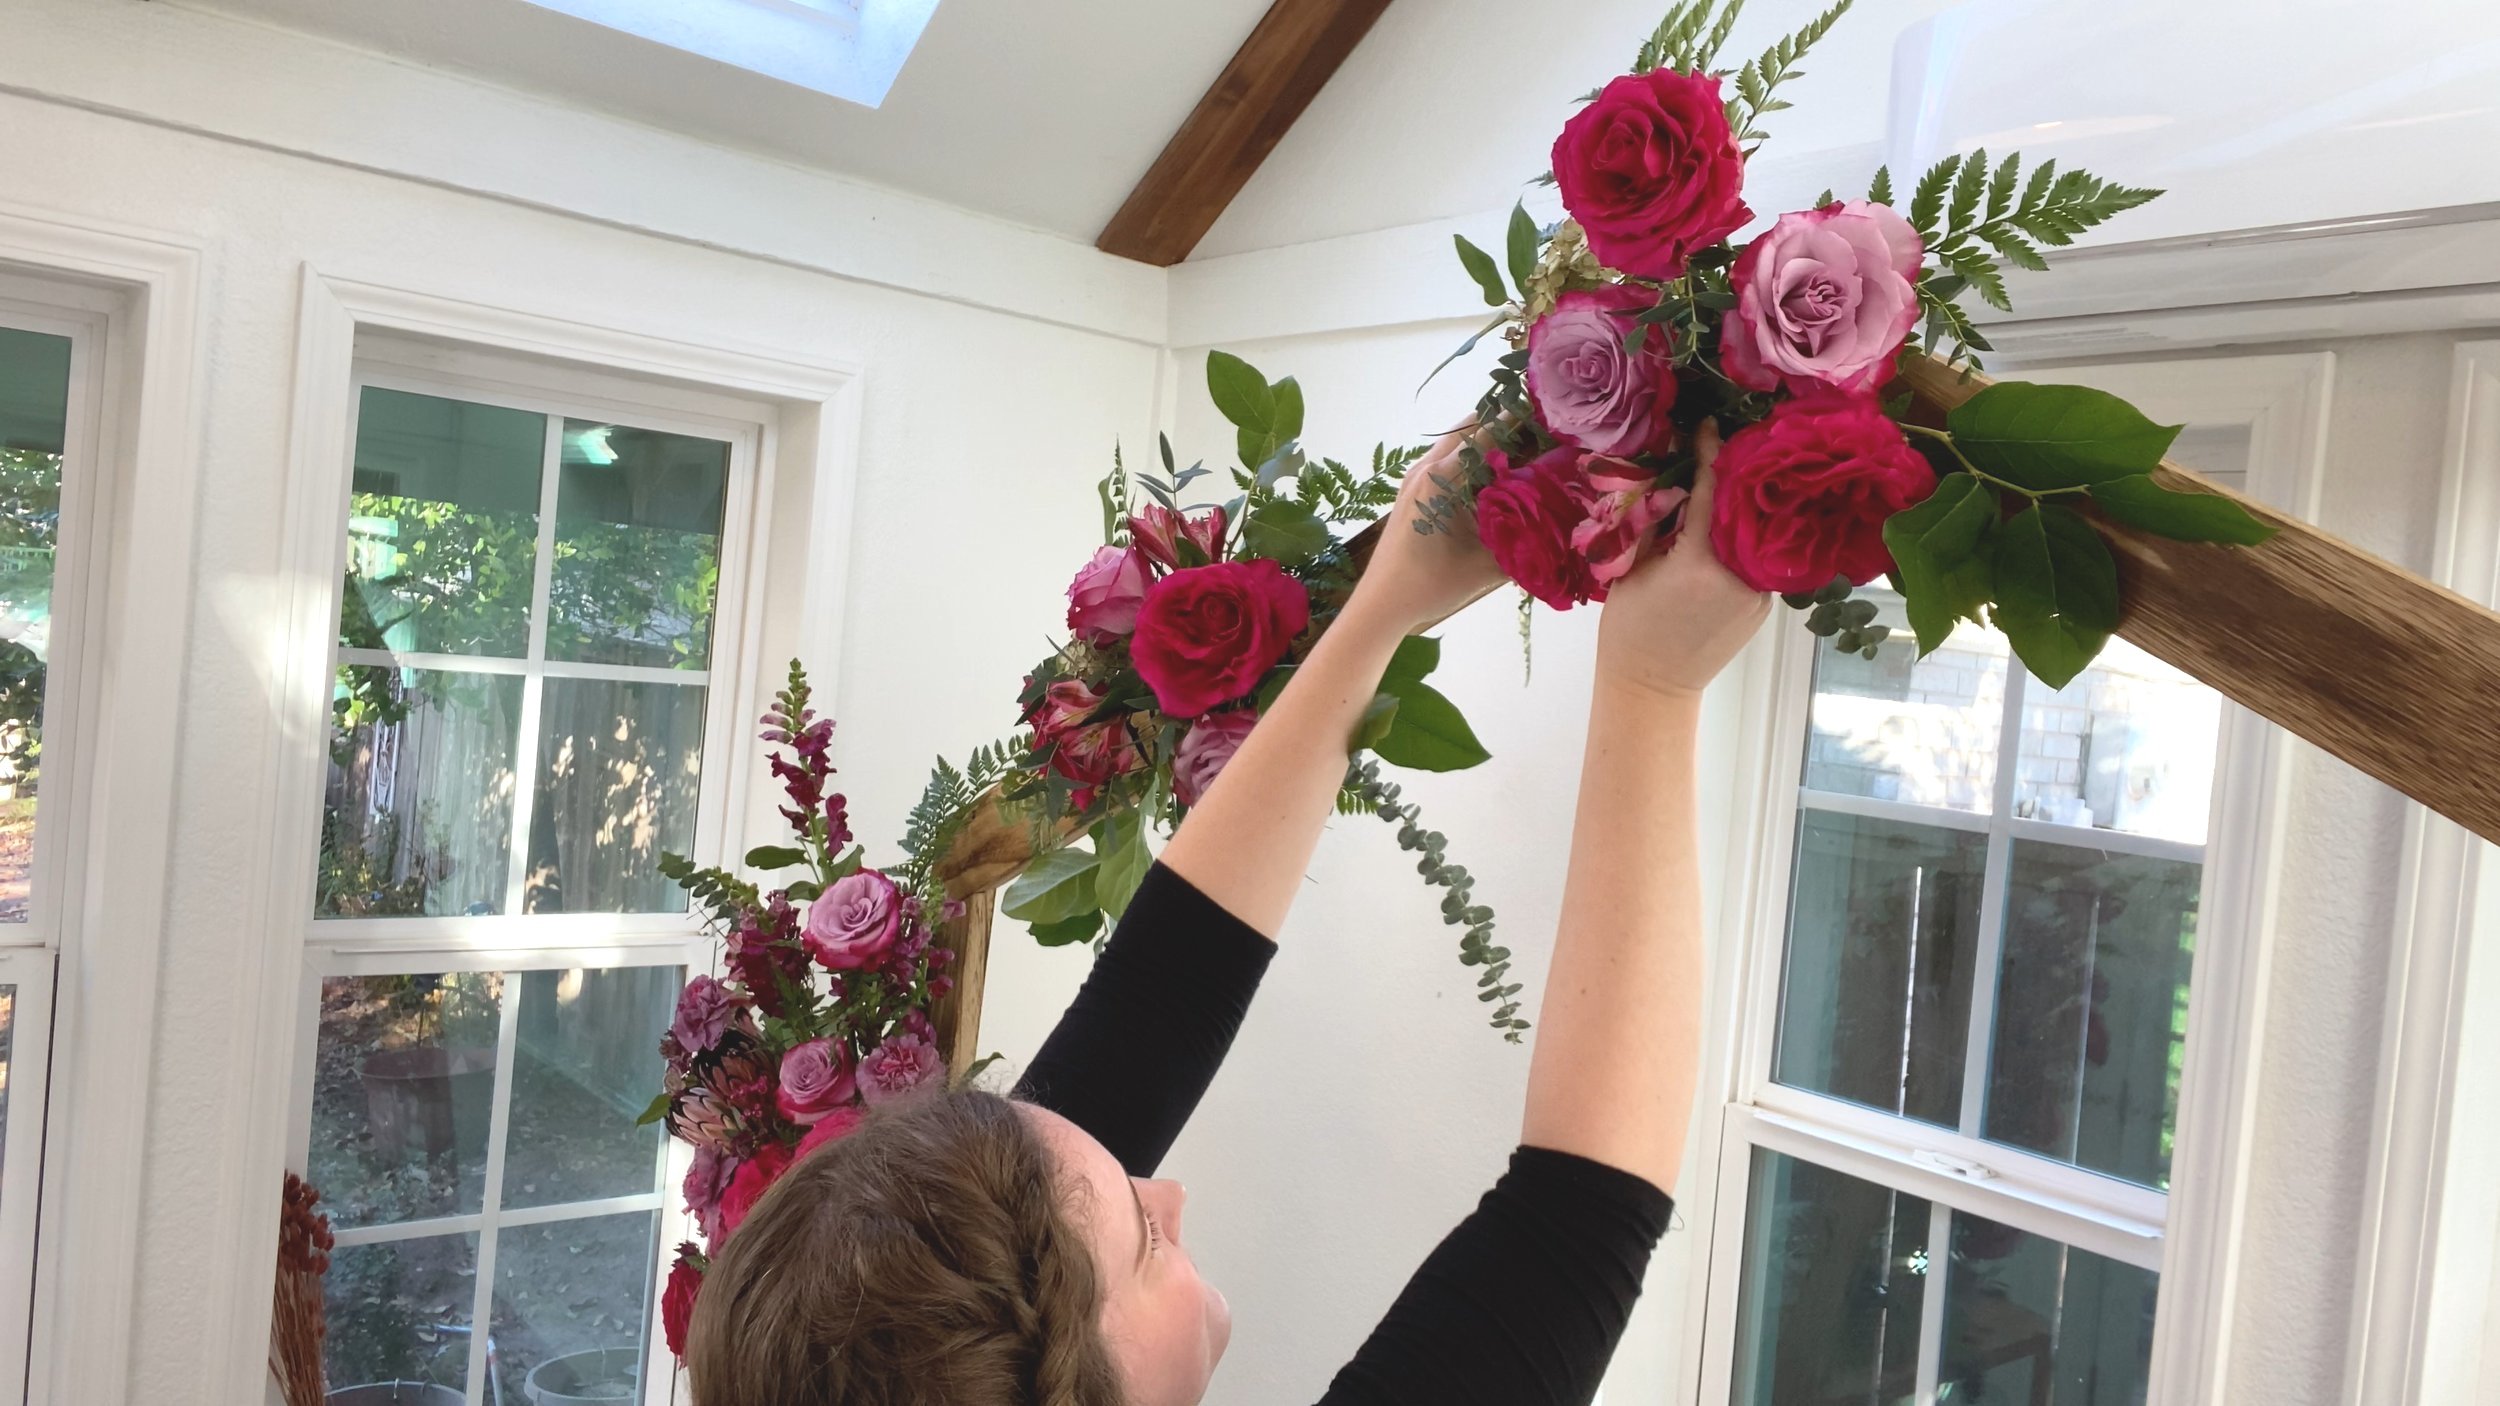
SMALL:
-
These two small foam cages are quick and easy and I usually do them in tandem. Greening first and working in the flowers as described above. Even though the recipes are smaller, you still use the same design approaches.
Lastly, I work in some light and feathery Plumosa Fern to help connect each arrangement so they don’t look disjointed. This (as with any of the arrangements) is totally optional!

Leave a comment