

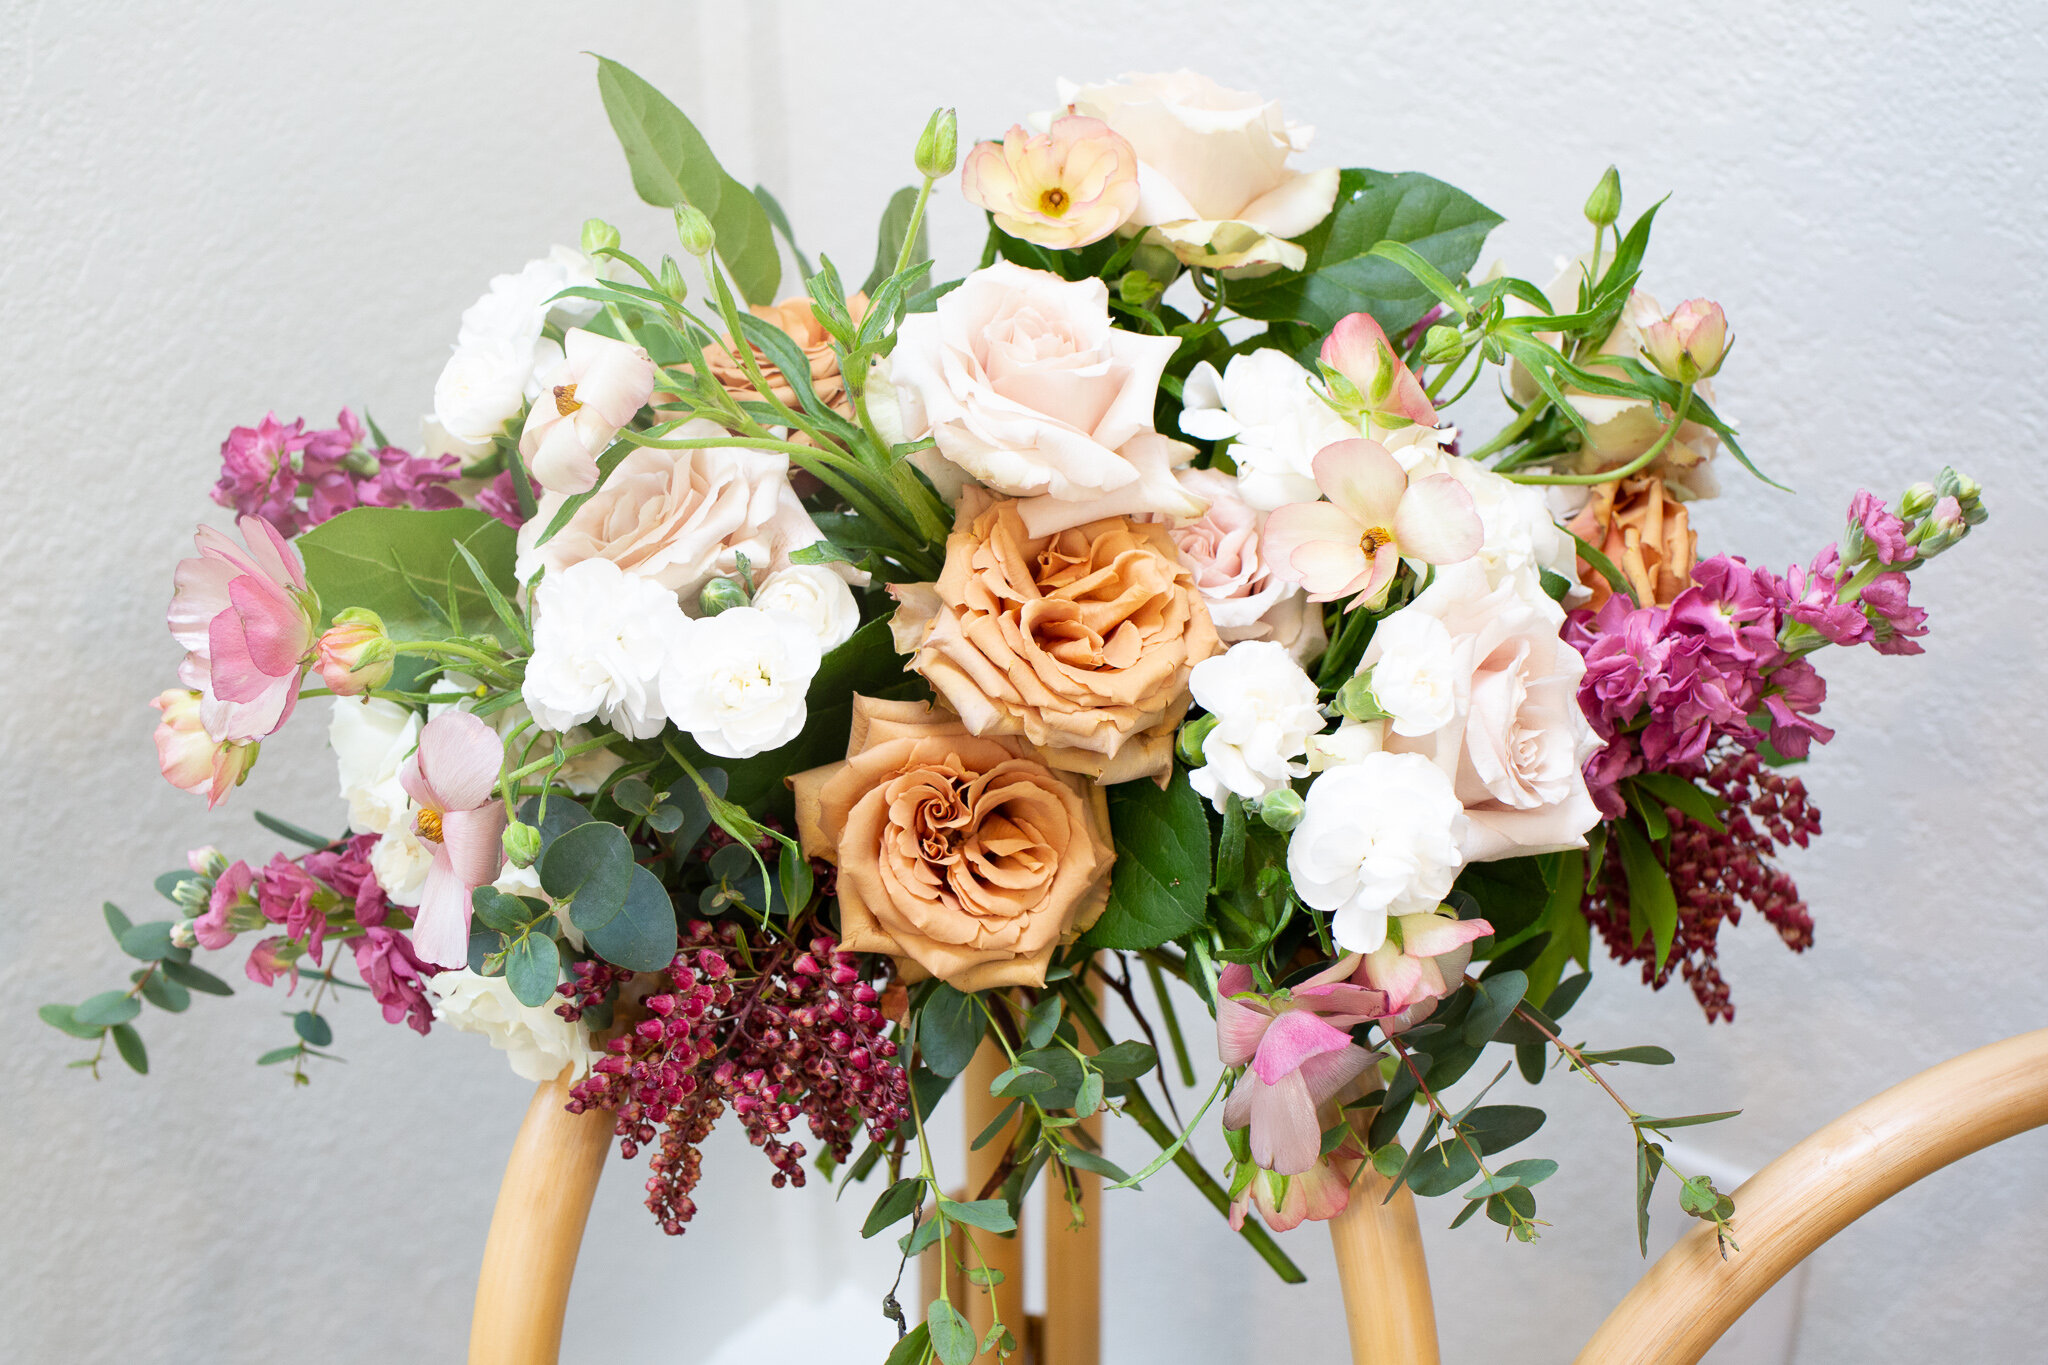
What on earth is the Holly Chapple Egg? Well flower friends it is a great tool to help you make a bouquet; it keeps your stems where you put them. To some, making a bridal bouquet can be intimidating because things shift and move around but this little plastic device, that looks like an egg, alleviates all of that. I also found that you can use WAY less greenery and floral because you aren’t trying to overcompensate with more flowers.
This is a great tool for any DIY bride or budding floral designer.
With bouquets, there are many shapes to choose from. I found this tool helpful in all of them. If you want a flowing organic bouquet, use the egg. If you want a round, traditional bouquet, use the egg. If you want a cascade bouquet… you see where this is going. Use this DIY tutorial to learn how to use an incredibly helpful tool in making pro-fesh looking bouquets!
Supplies:
-
Holly Chapple Egg (you can find them on Amazon)
-
There are two sizes. 6” for bridal bouquets and 4” for bridesmaids. If you want a smaller bridal bouquet go for the 4”!
-
-
Floral Tape
-
Ribbon
How to use the egg
How to make a bouquet- Holly Chapple Egg:
-
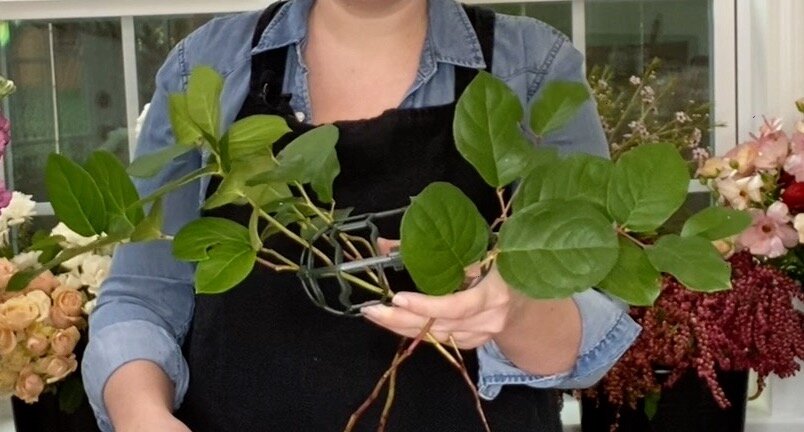
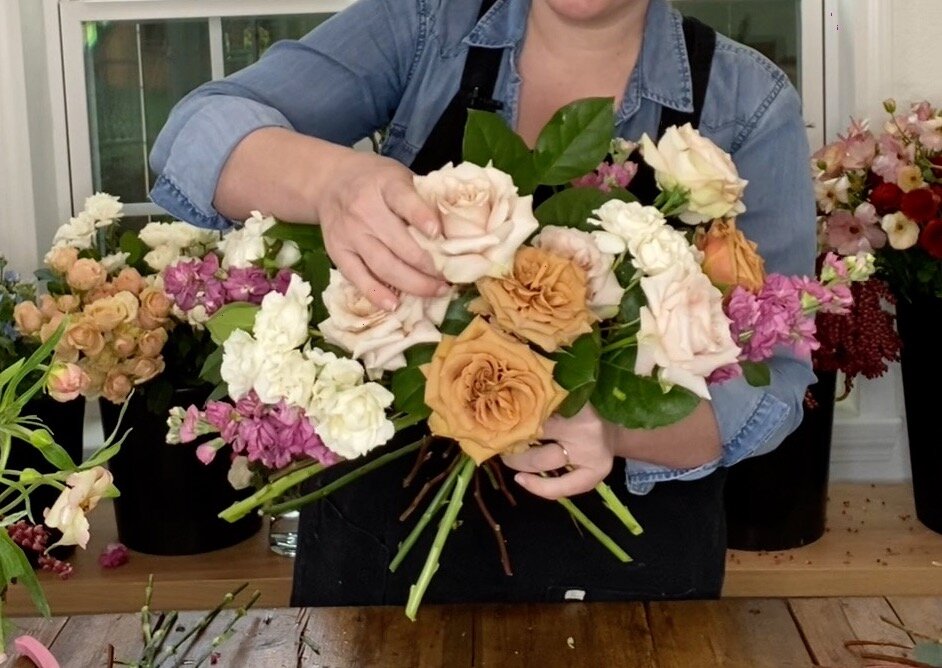
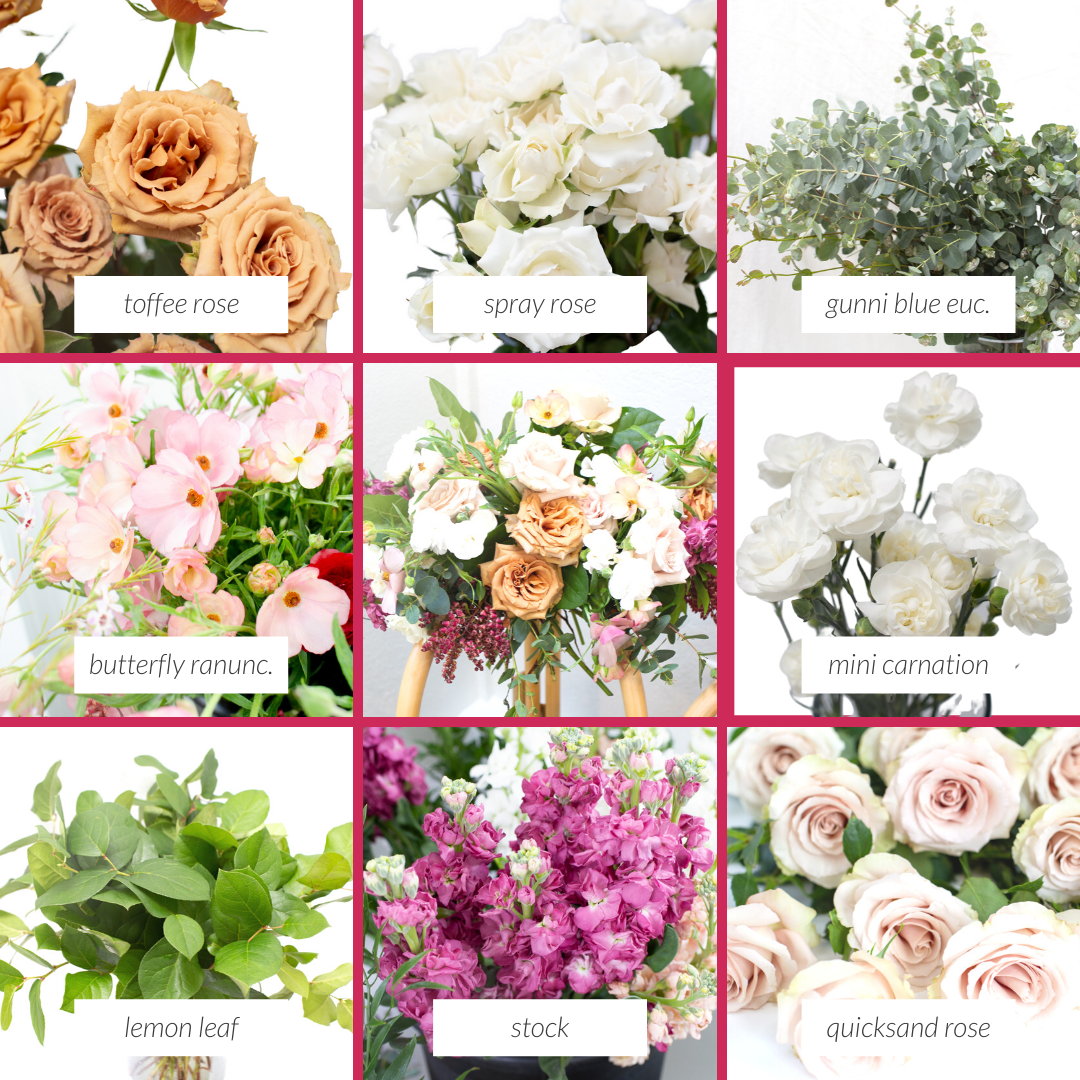
Holding your egg in your non-dominant hand begins placing greenery. Place a few stems of one variety (if you are using more than one) and then a few of another. You want to try for different lengths, shapes, and sizes. Don’t worry about covering the entire egg with greenery. We will fill in with flowers.
-
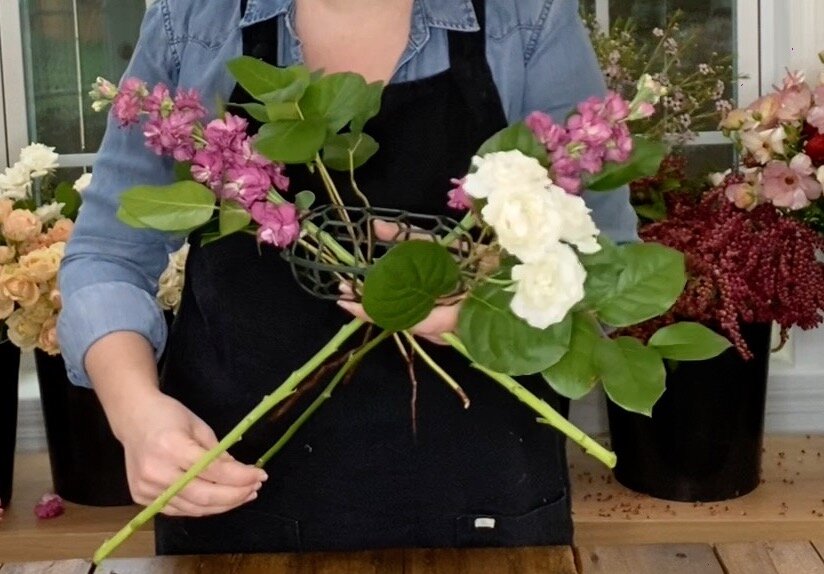
Once you’ve placed a few key pieces of greenery, move on to your linear blooms. I like to use stock or snapdragons. They help create shape and length (if you want a more organic bouquet)
-
Next use your sprays such as spray roses or mini carnations. THis is where we can start to cover up more of the egg.
-
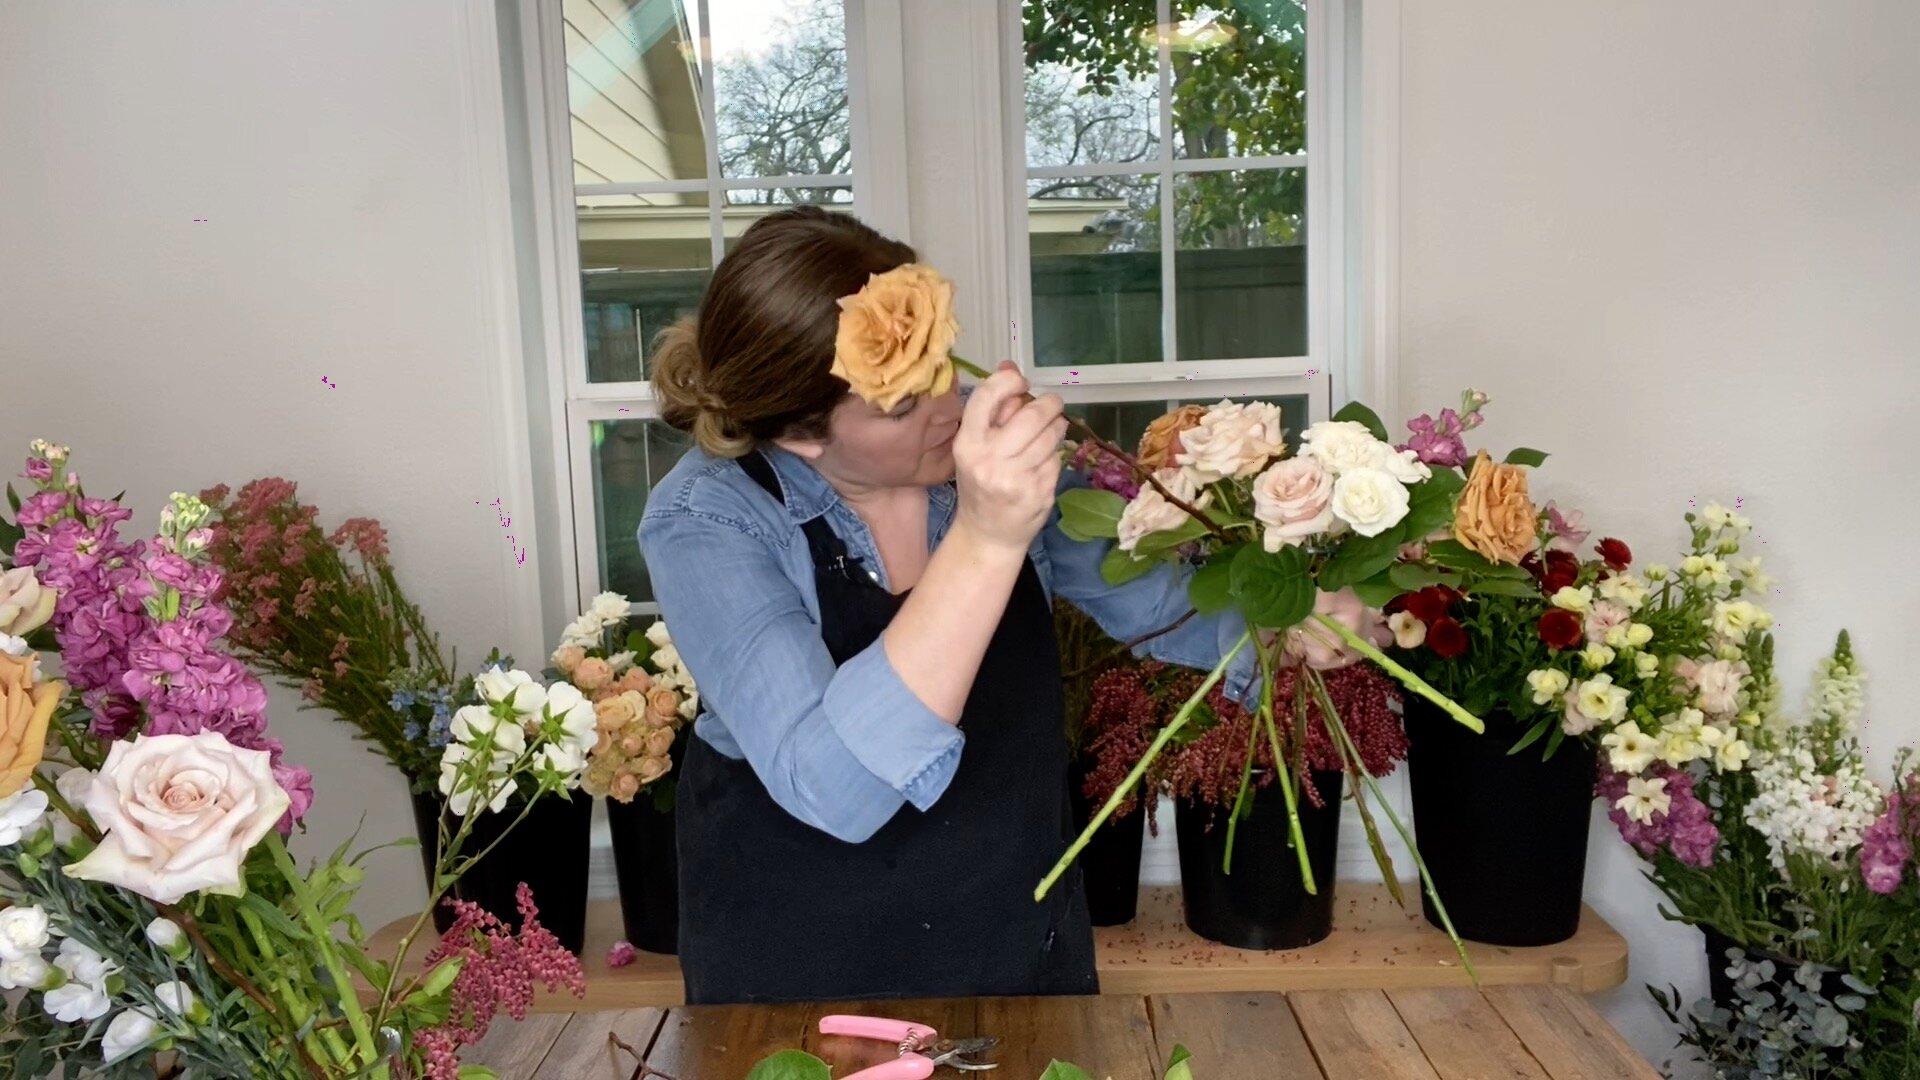
After placing the sprays move on to our focal flowers such as roses. We’ve used two varieties of roses in this tutorial, play with depth and placement. Make sure they are not all on the same plane to create depth and a more professional look.
-
Pro Tip. Periodically stop and trim your stems! They don’t need to be 24” long while you are designing. It will make things WAY more manageable.

-
Once the roses are placed, move on to your detailed flowers. Here we’ve used delicate butterfly ranunculus. We place these after the bouquet is mostly done because we don’t want them to get lost or smashed while building the structure.
-
Once the bouquet is looking full and almost finished, fill in any holes you see with leftover greenery. Pay attention to the drape of the greenery to compliment the design of your bouquet.
-
Finish off the bouquet with some floral tape securing the stems at the base. This can be loose and helpful for ribbon placement.
-
Pro Suggestion: practice placing the stems at an angle for a more organic look. Thread through the Egg structure and other flowers at different heights for a more dynamic look.
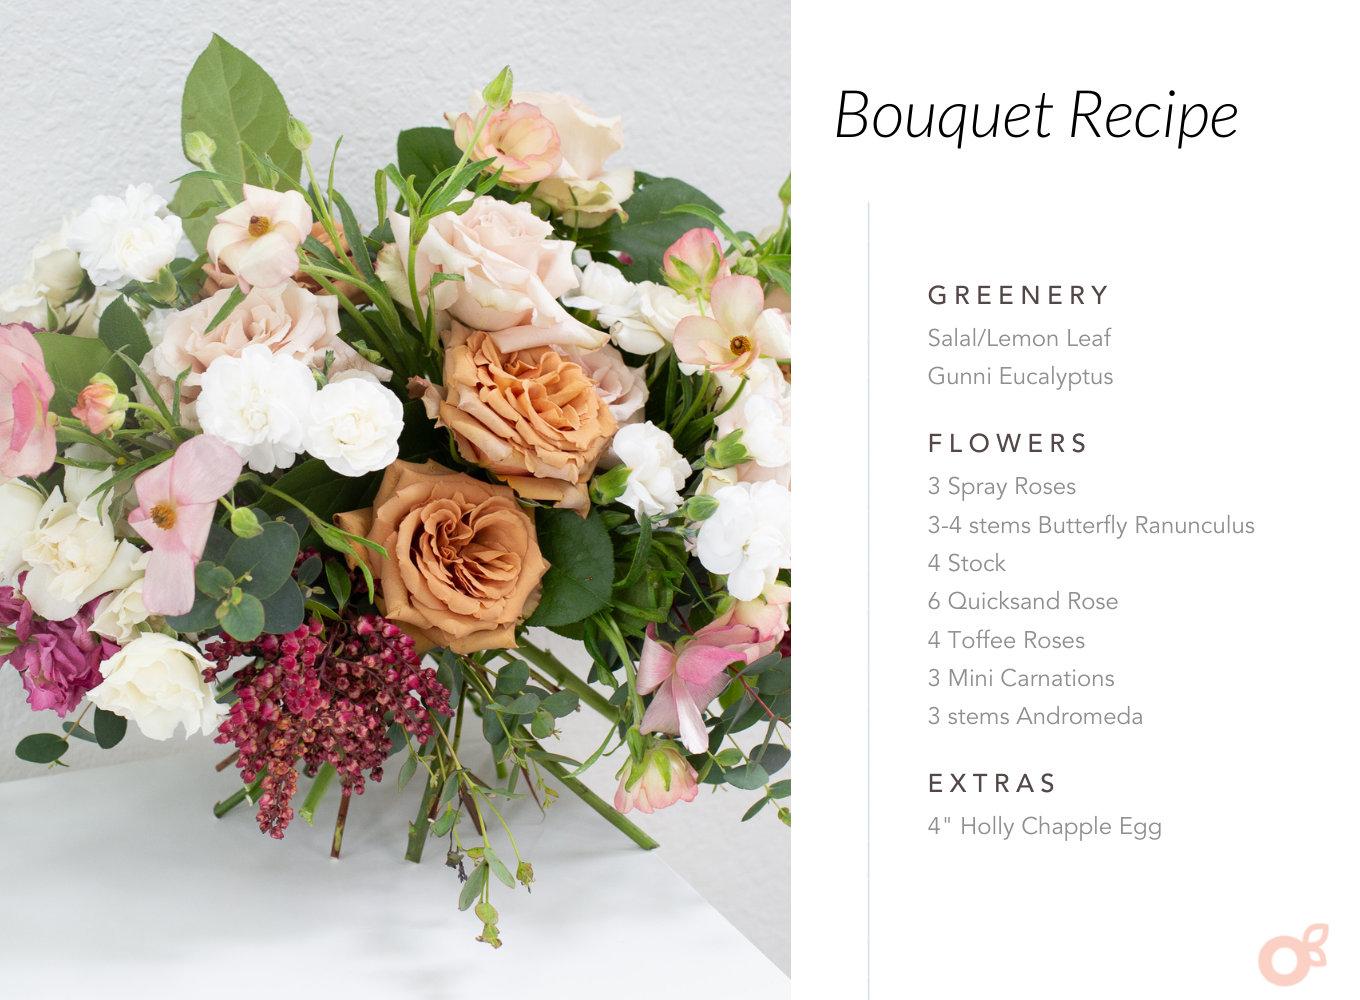
Floral Recipe
Leave a comment