

Put A Flower On it!
Or three or four or five. You get point.
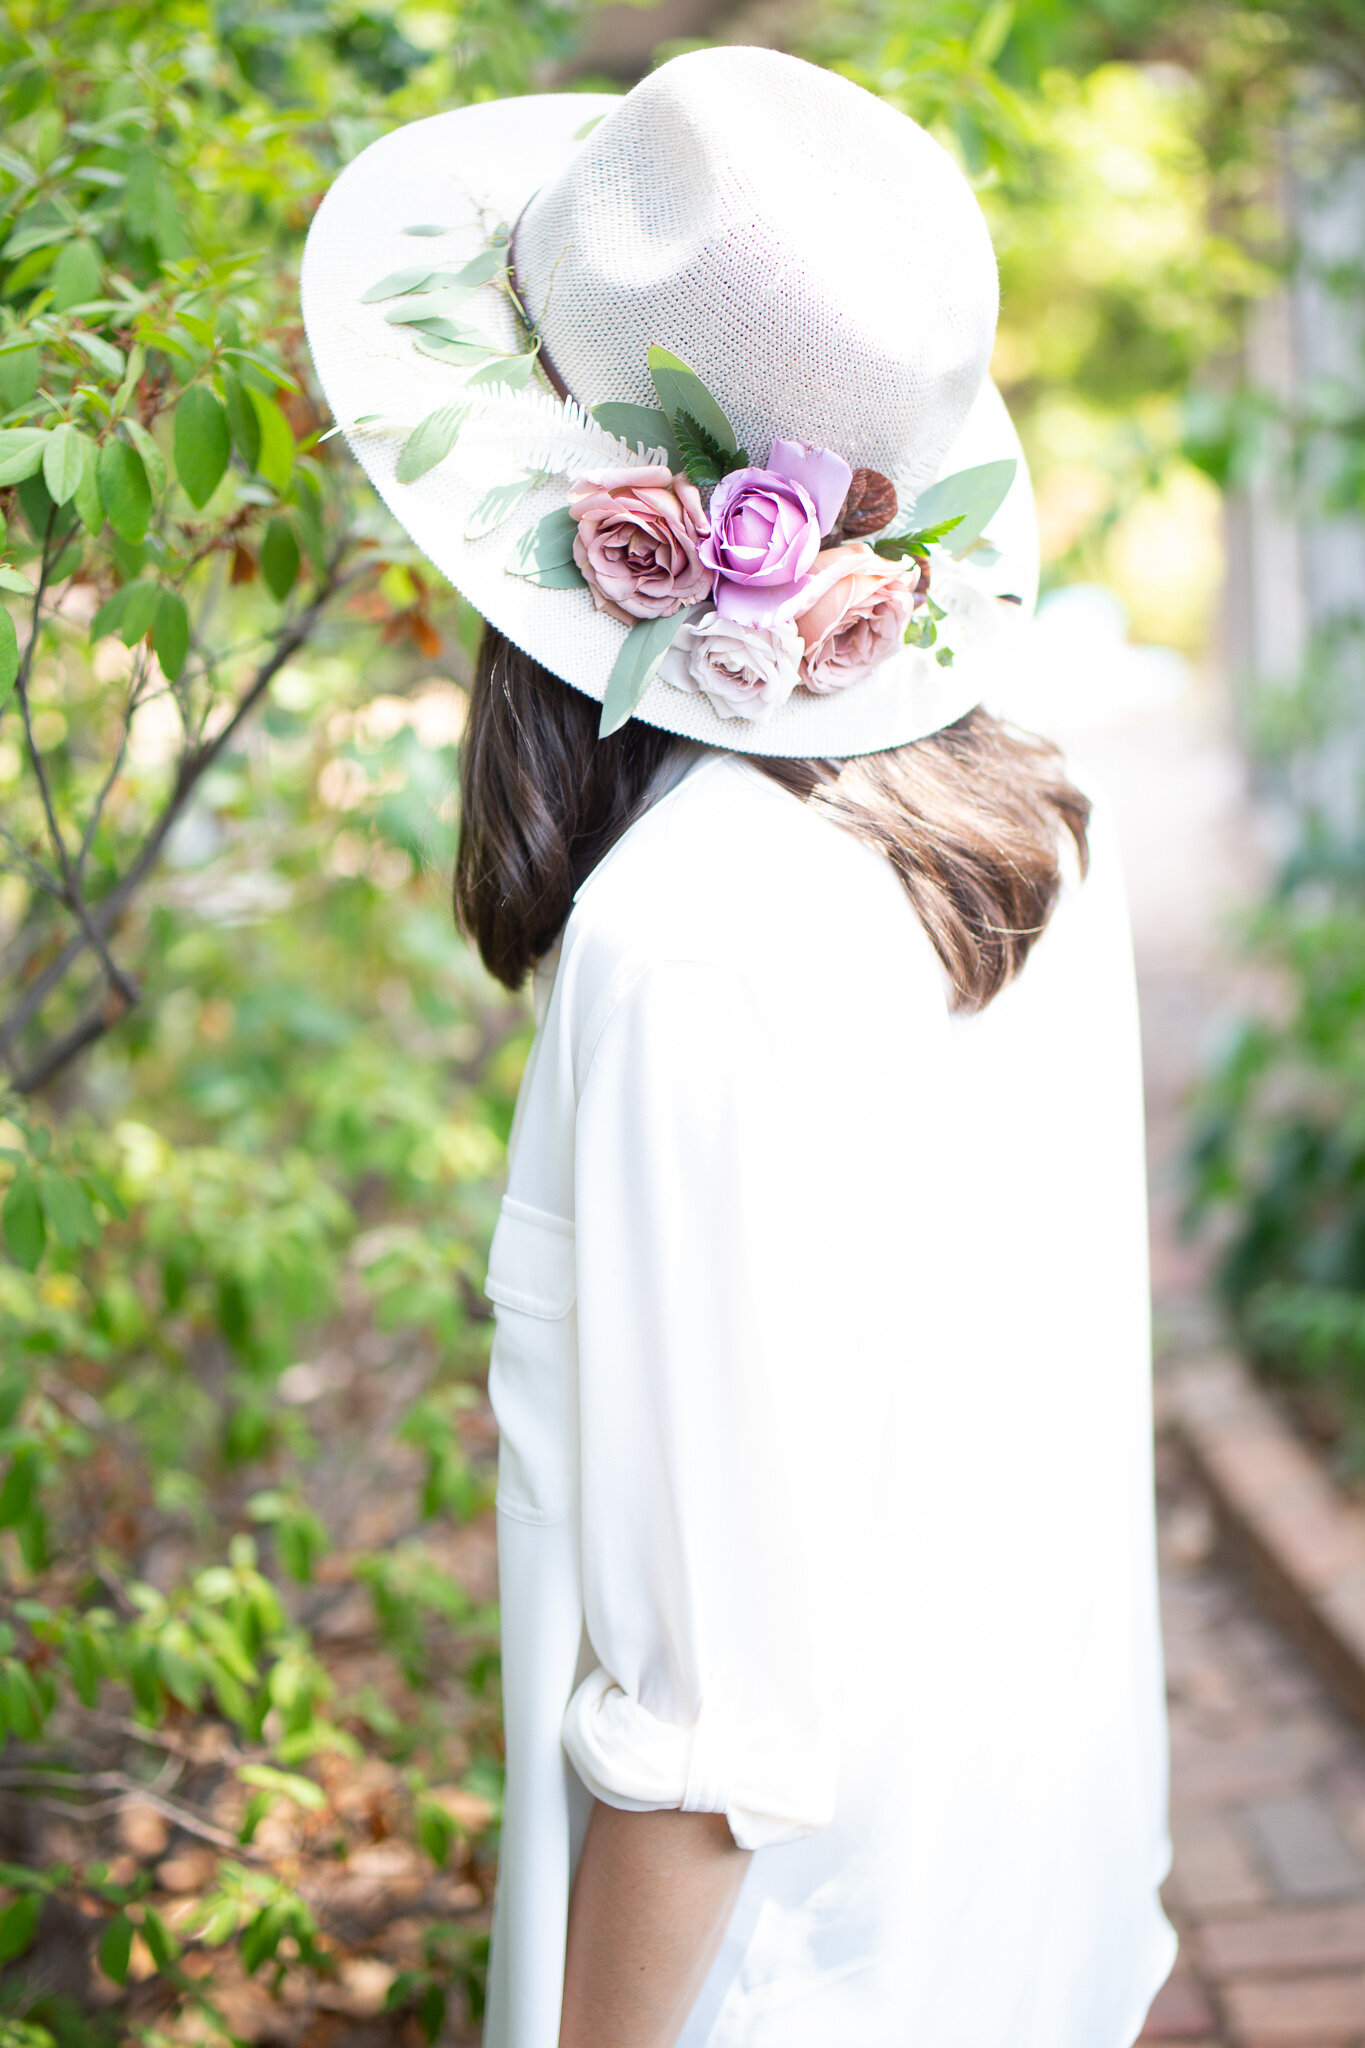
This easy tutorial will help you adorn your fave hat with fresh (you can also use faux) florals. This step by step process is fool-proof and will upgrade your bachelorette weekend brunch look like an influencer.
As with most floral pieces, you can go hard on this or you can go home! JK, you can make it as elaborate or as delicate as you please. If you are the type of person to rock a hat this is such a fun way to snaz up your look and fun way to make a girls weekend feel a bit more extra. Or if you just love a good accessory, you can dress this one up in a truly memorable way.

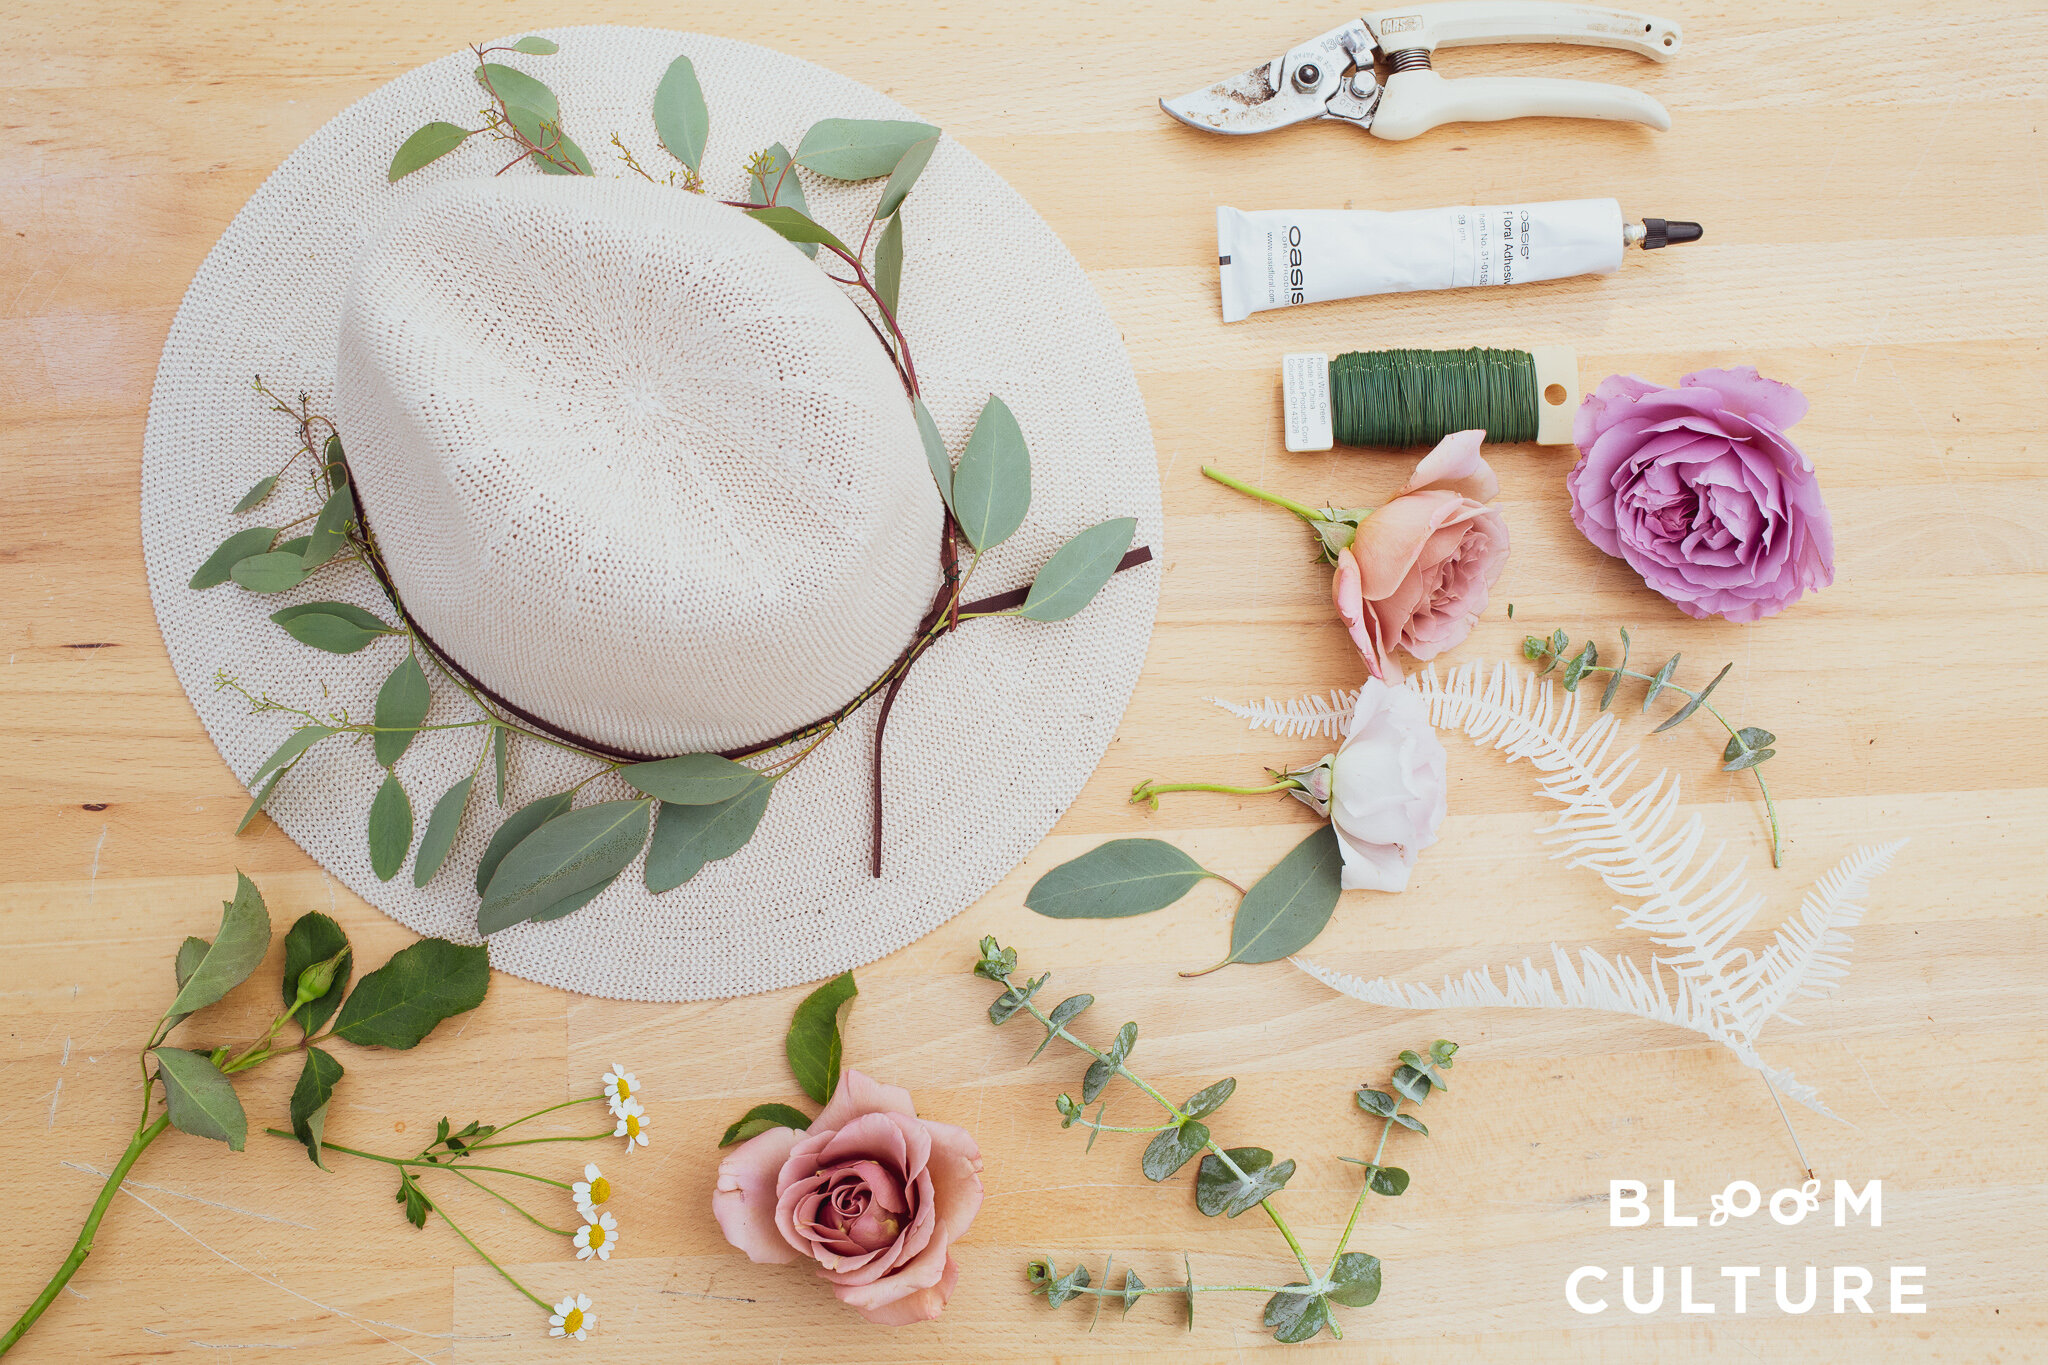
Supplies:
-
Hat
-
snips
-
paddle wire
-
floral adhesive
-
Eucalyptus
-
Roses/Spray roses
-
Dried & Fresh Product (fern, chamomile)
Process:
Step one: Source a hat. I am not a pro on hat shapes or styles but choose what works best for you and the look you are going for. Any hat will do!
Step two: gather your supplies, all you need are some wire, snips, and if it is a one time use hat (that you don’t mind getting glue on) you can always use glue to help set your flowers in the perfect position.
Step three: Get your flowers, faux or fresh. In this tutorial we are using fresh.
Step four: Prep all your flowers and greenery.
-
Pick out your fave blooms, clean off any unwanted leaves or petals that look less than stellar.
-
Snip smaller, more manageable stems of greenery.
Step 5: wire on your greenery. I think of it as making a greenery halo around the hat, you can go as heavy or as light on the greenery as you’d like. I went fairly light on our hat.
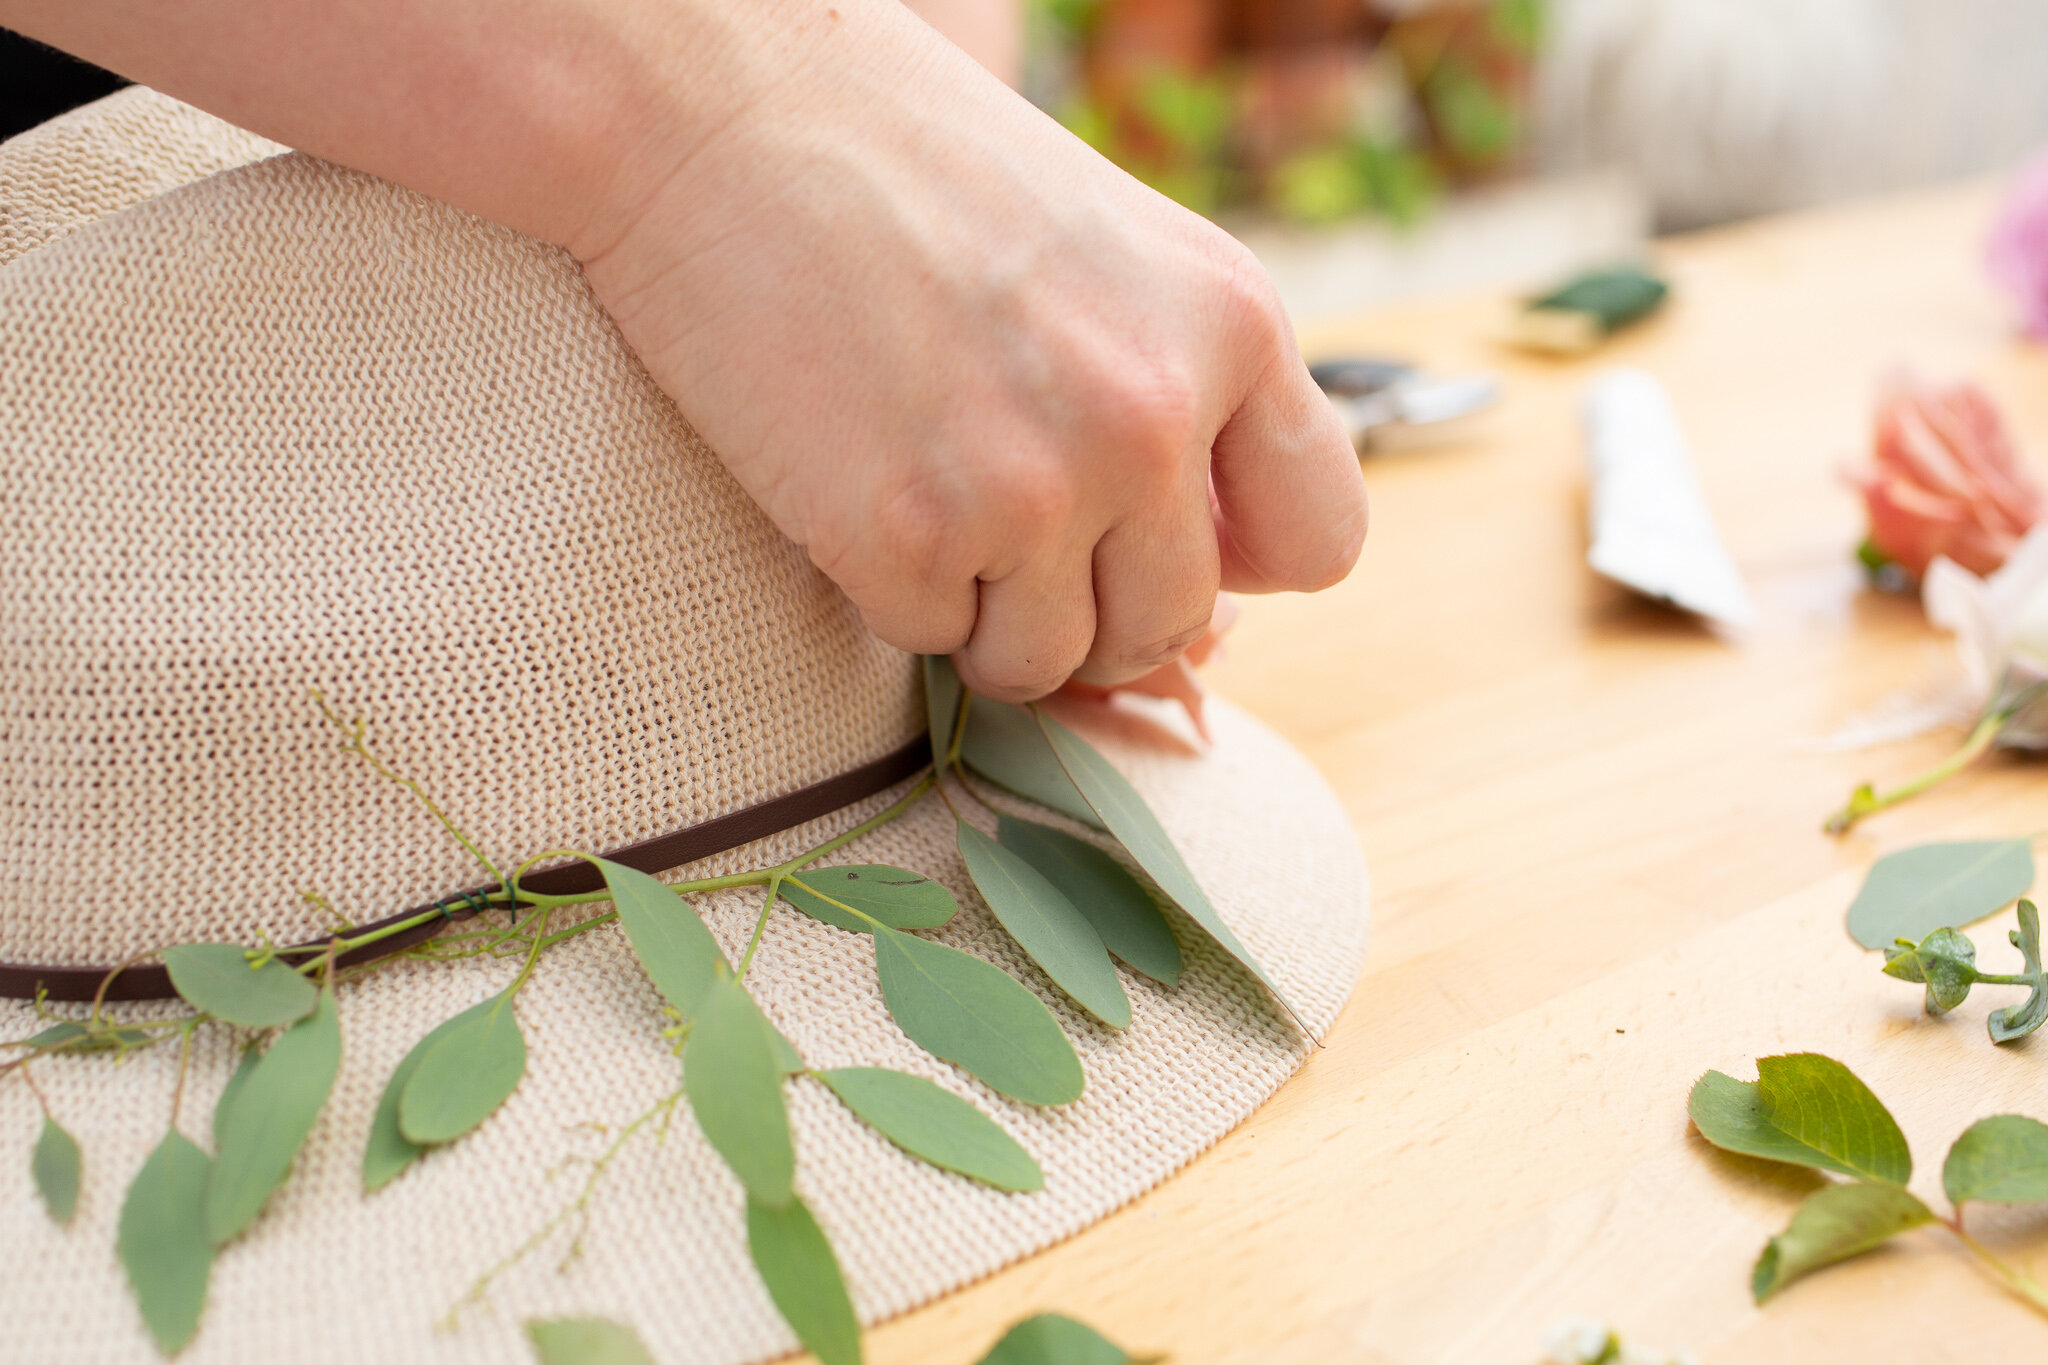
Side Note: Although wiring can be a little more time intensive, it’s great for securing the product to the hat as you can thread it through depending on what type of material your hat is. The hat we’ve used is a permeable material and I am able to “sow” our thin wire through.
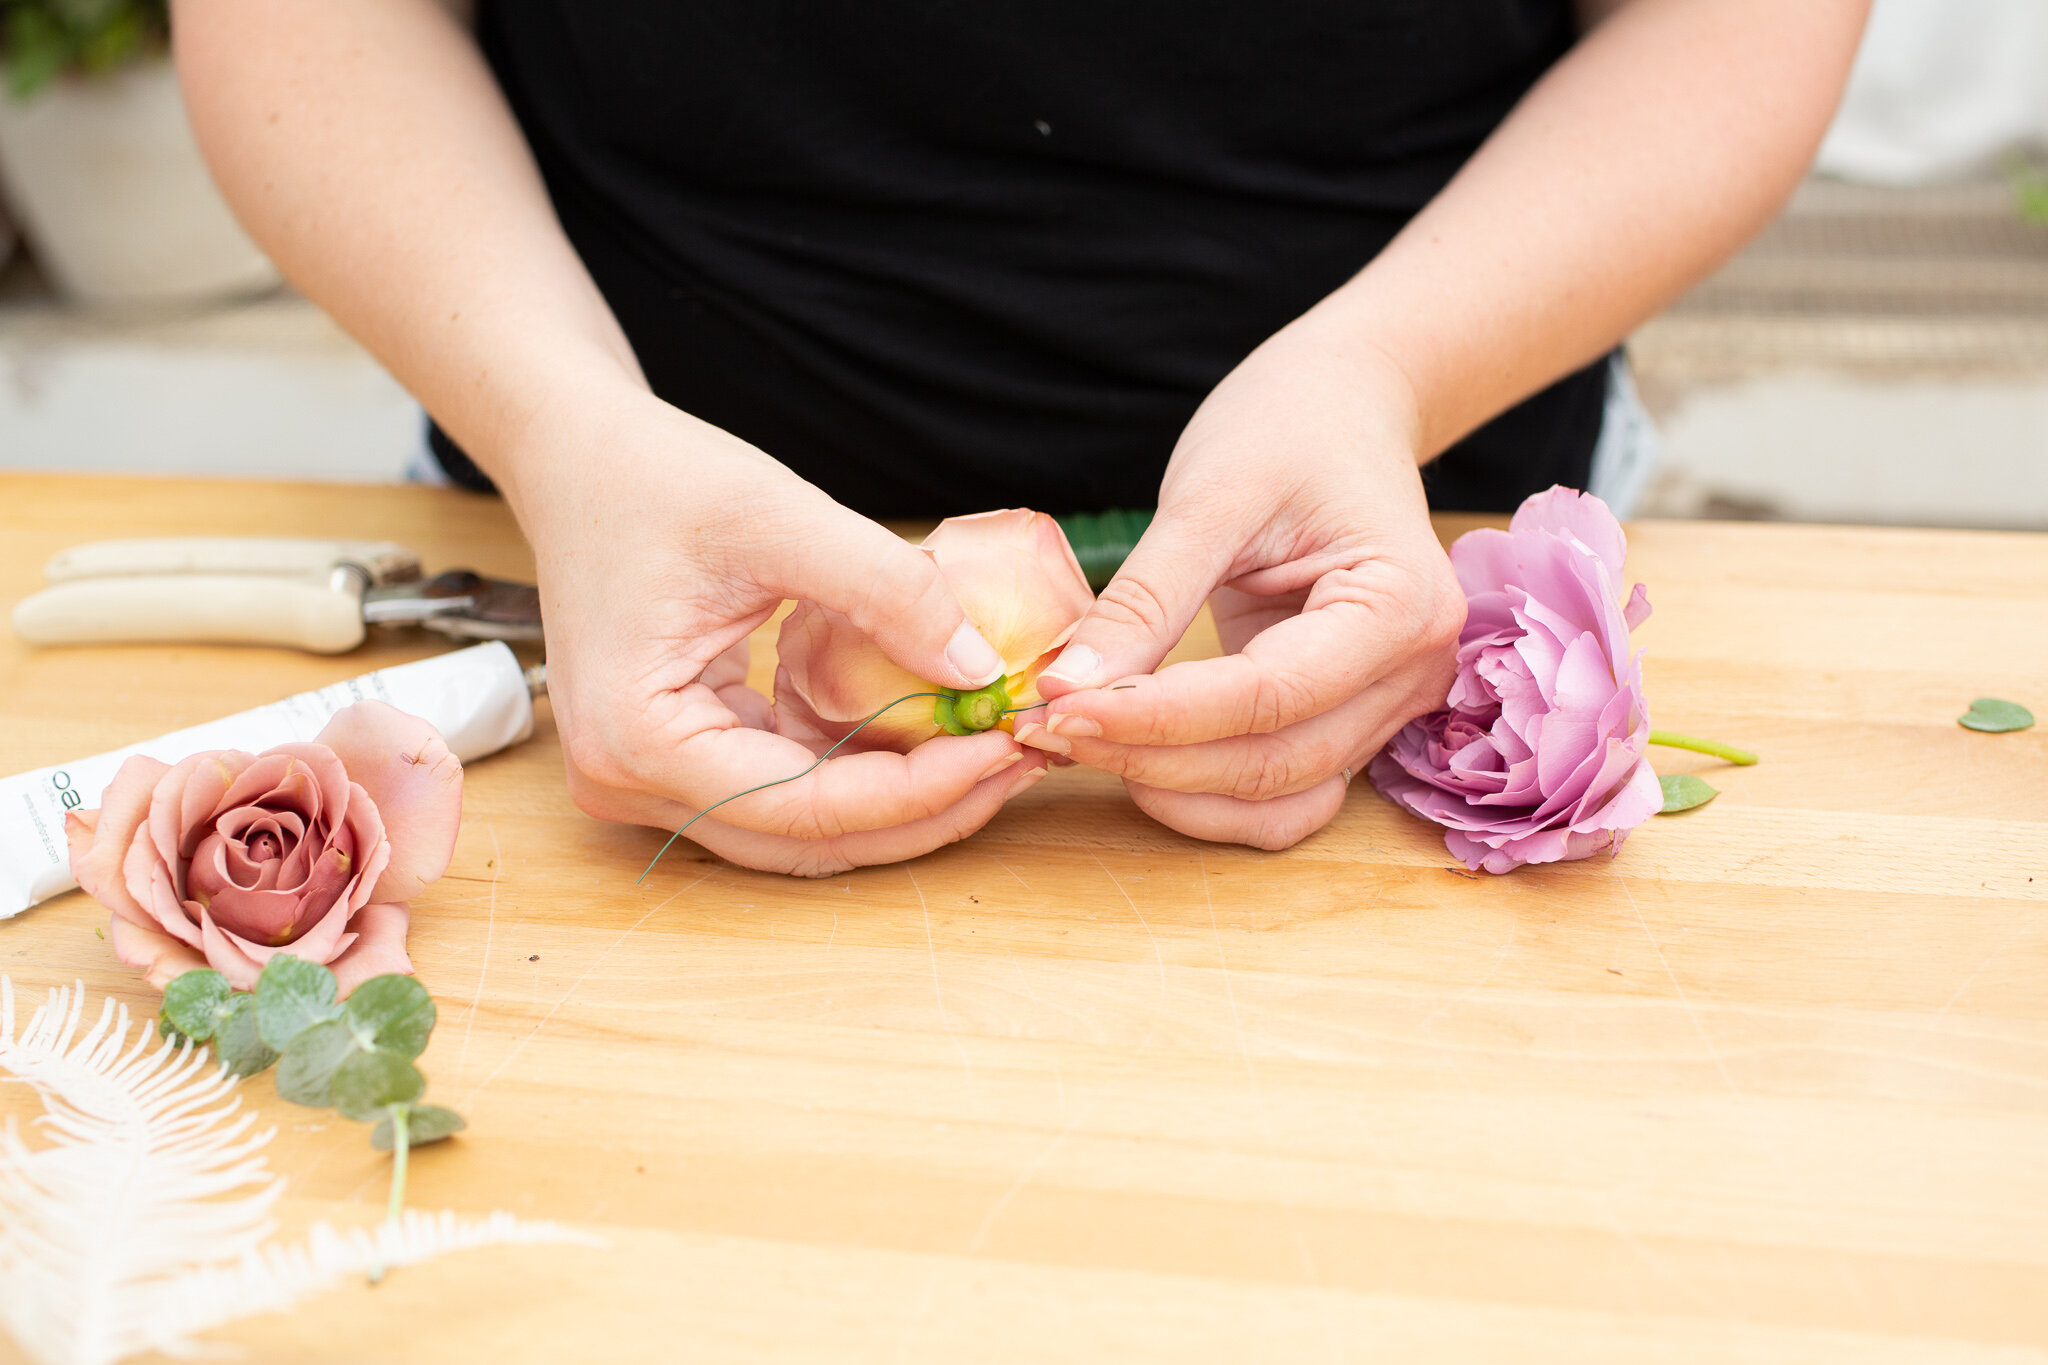
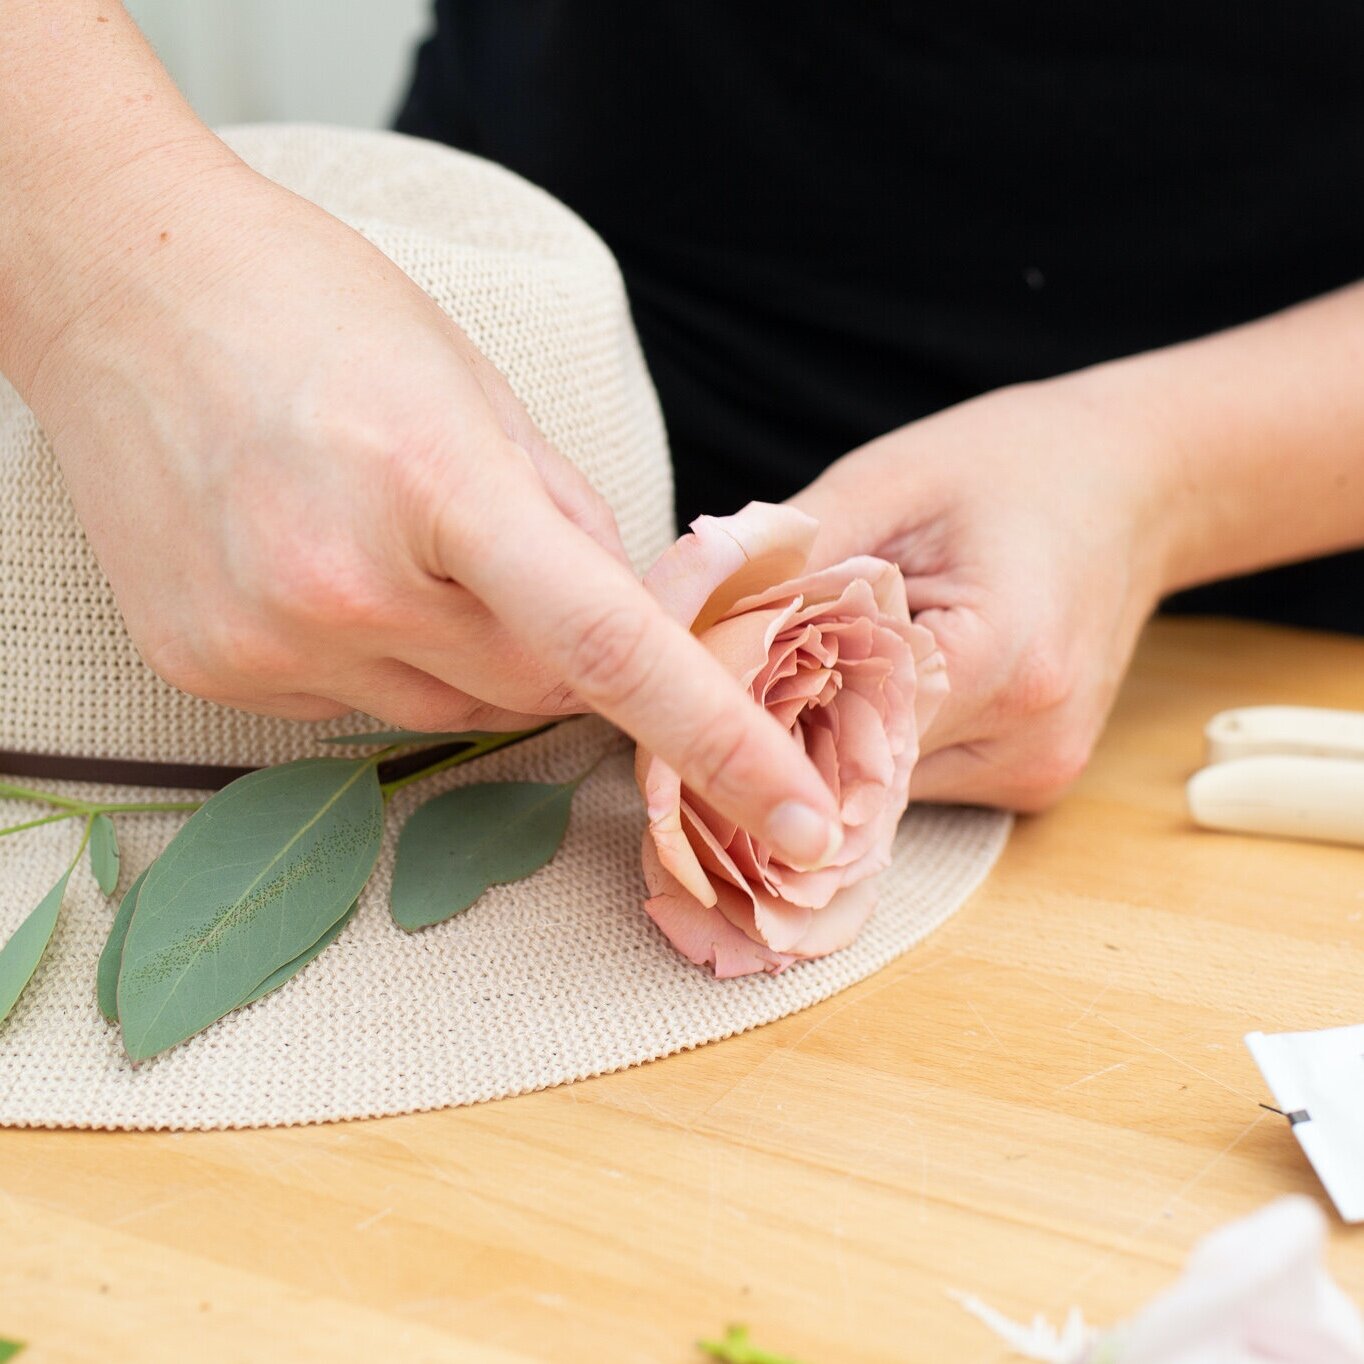
Step 6: Wire your focal flowers. Here we’ve used garden roses.
-
Cut the rose as close to the base of the bloom as possible and thread the wire through the base (also known as the calyx). Do this twice to make an X.
-
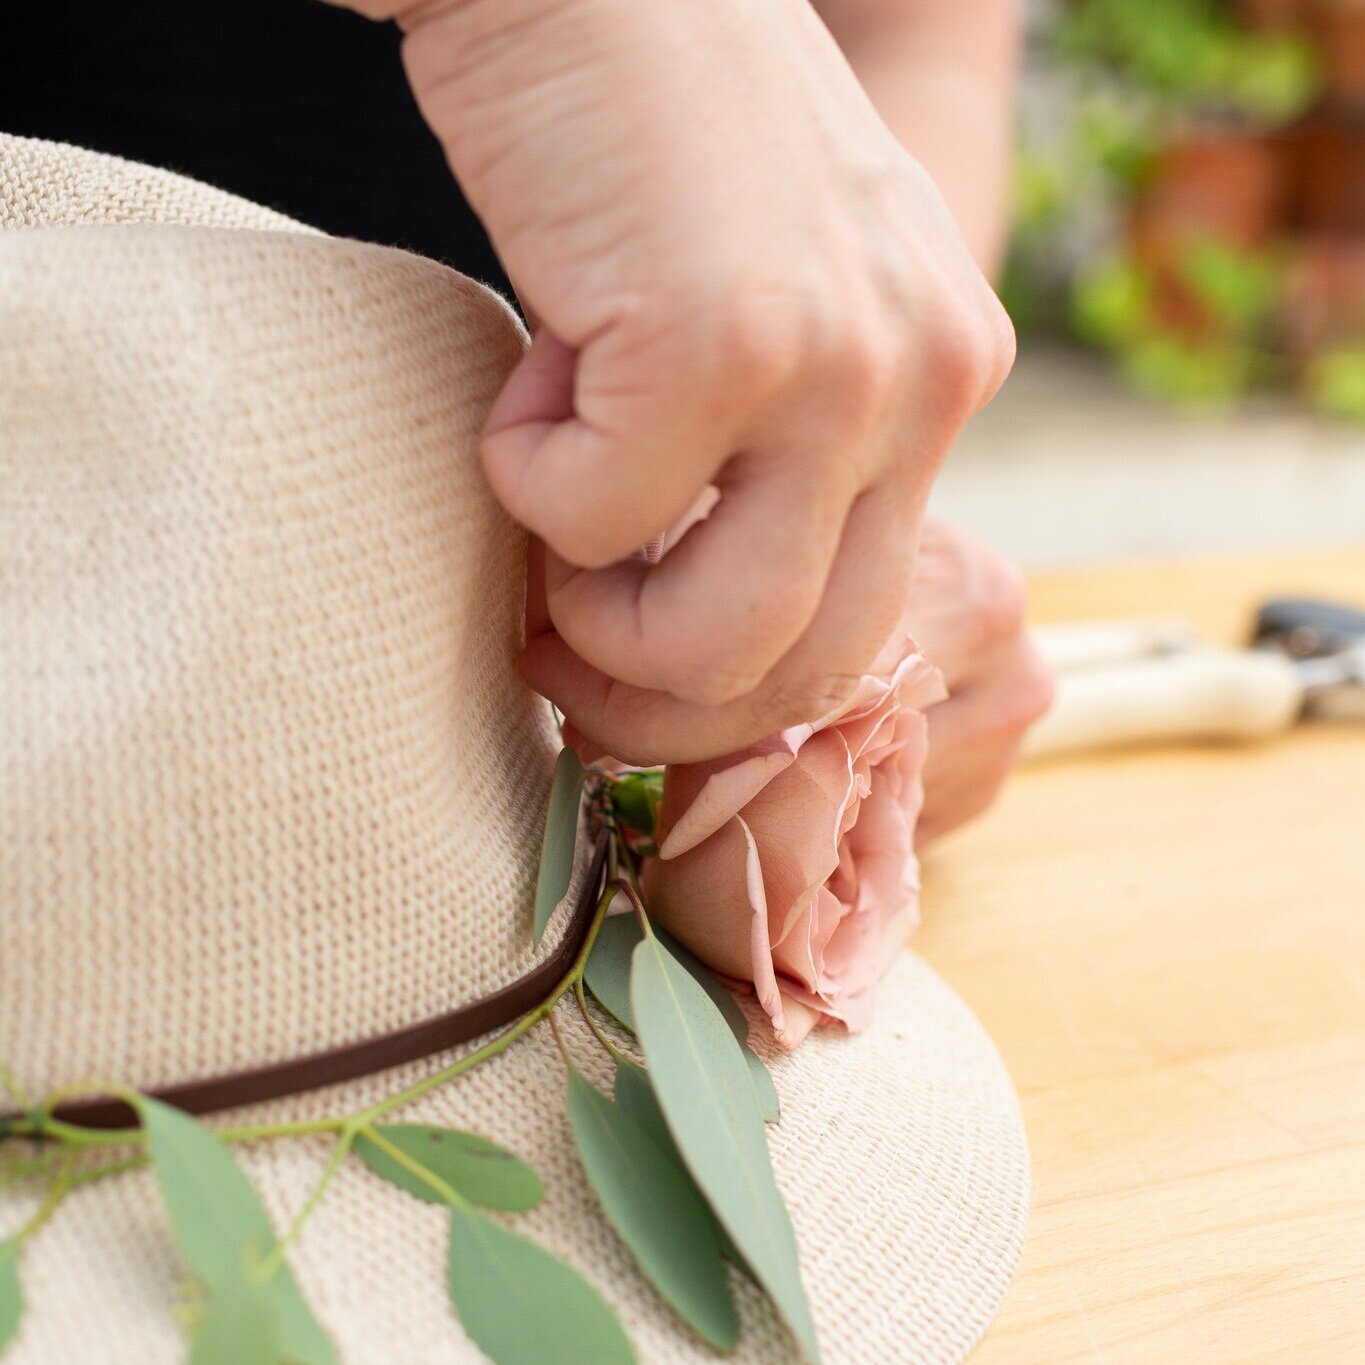
Next you can either wire the flower to the greenery you’ve already placed or wire it to the hat as we’ve done.
 |
 |
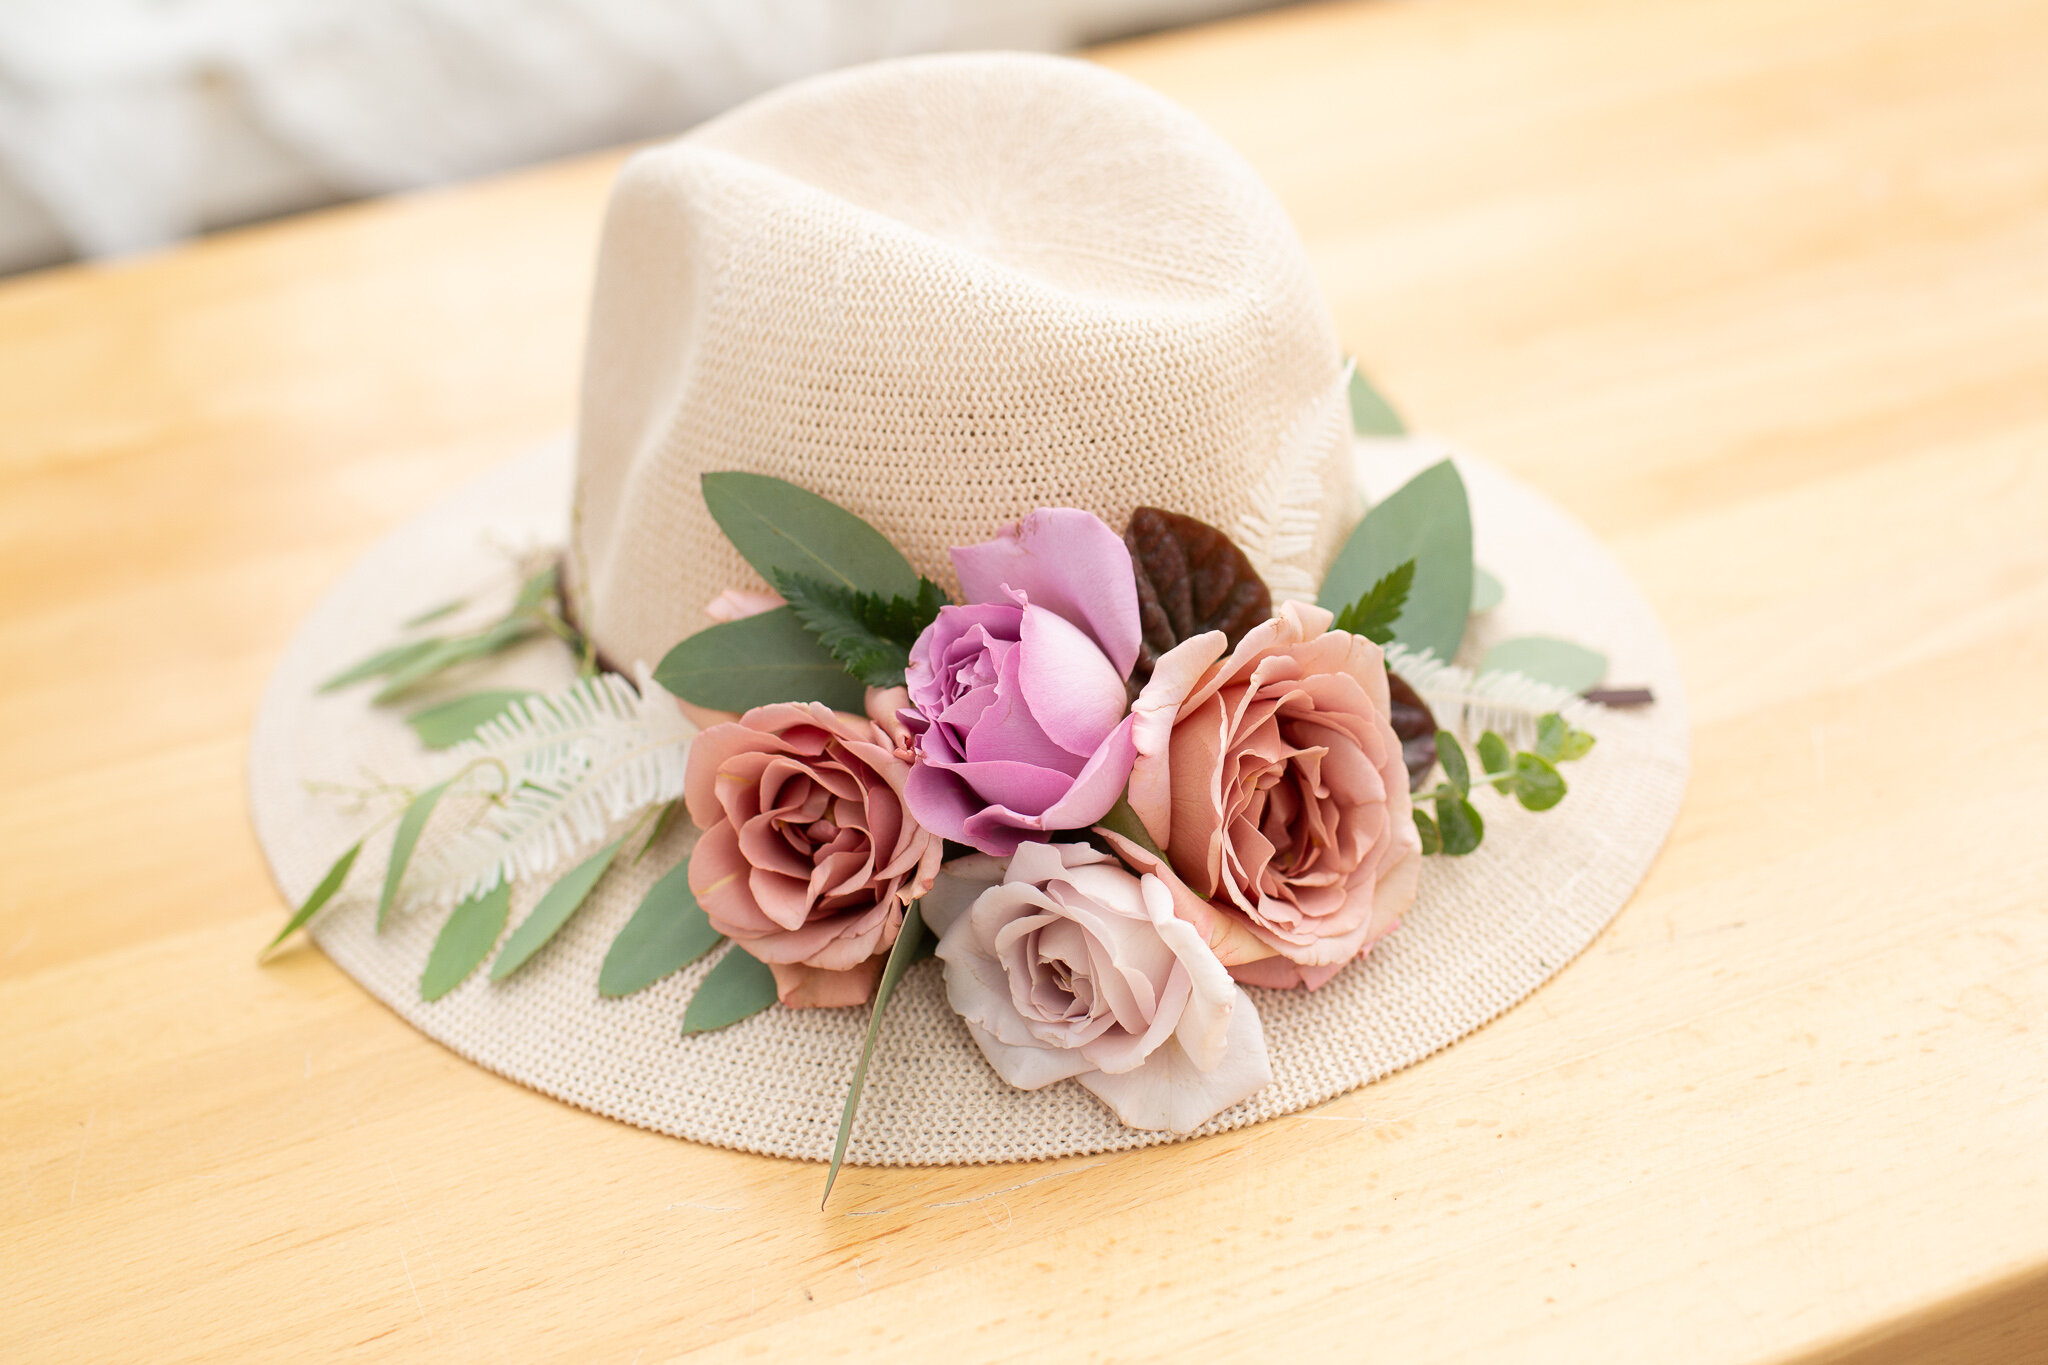
Step 7: Go to town! You can wire in as many blooms as you like. Play with the design that best fits your personality. Here we’ve made a small focal grouping but we’ve seen some that go the entire way around the hat. You do you! And also what you have time for.
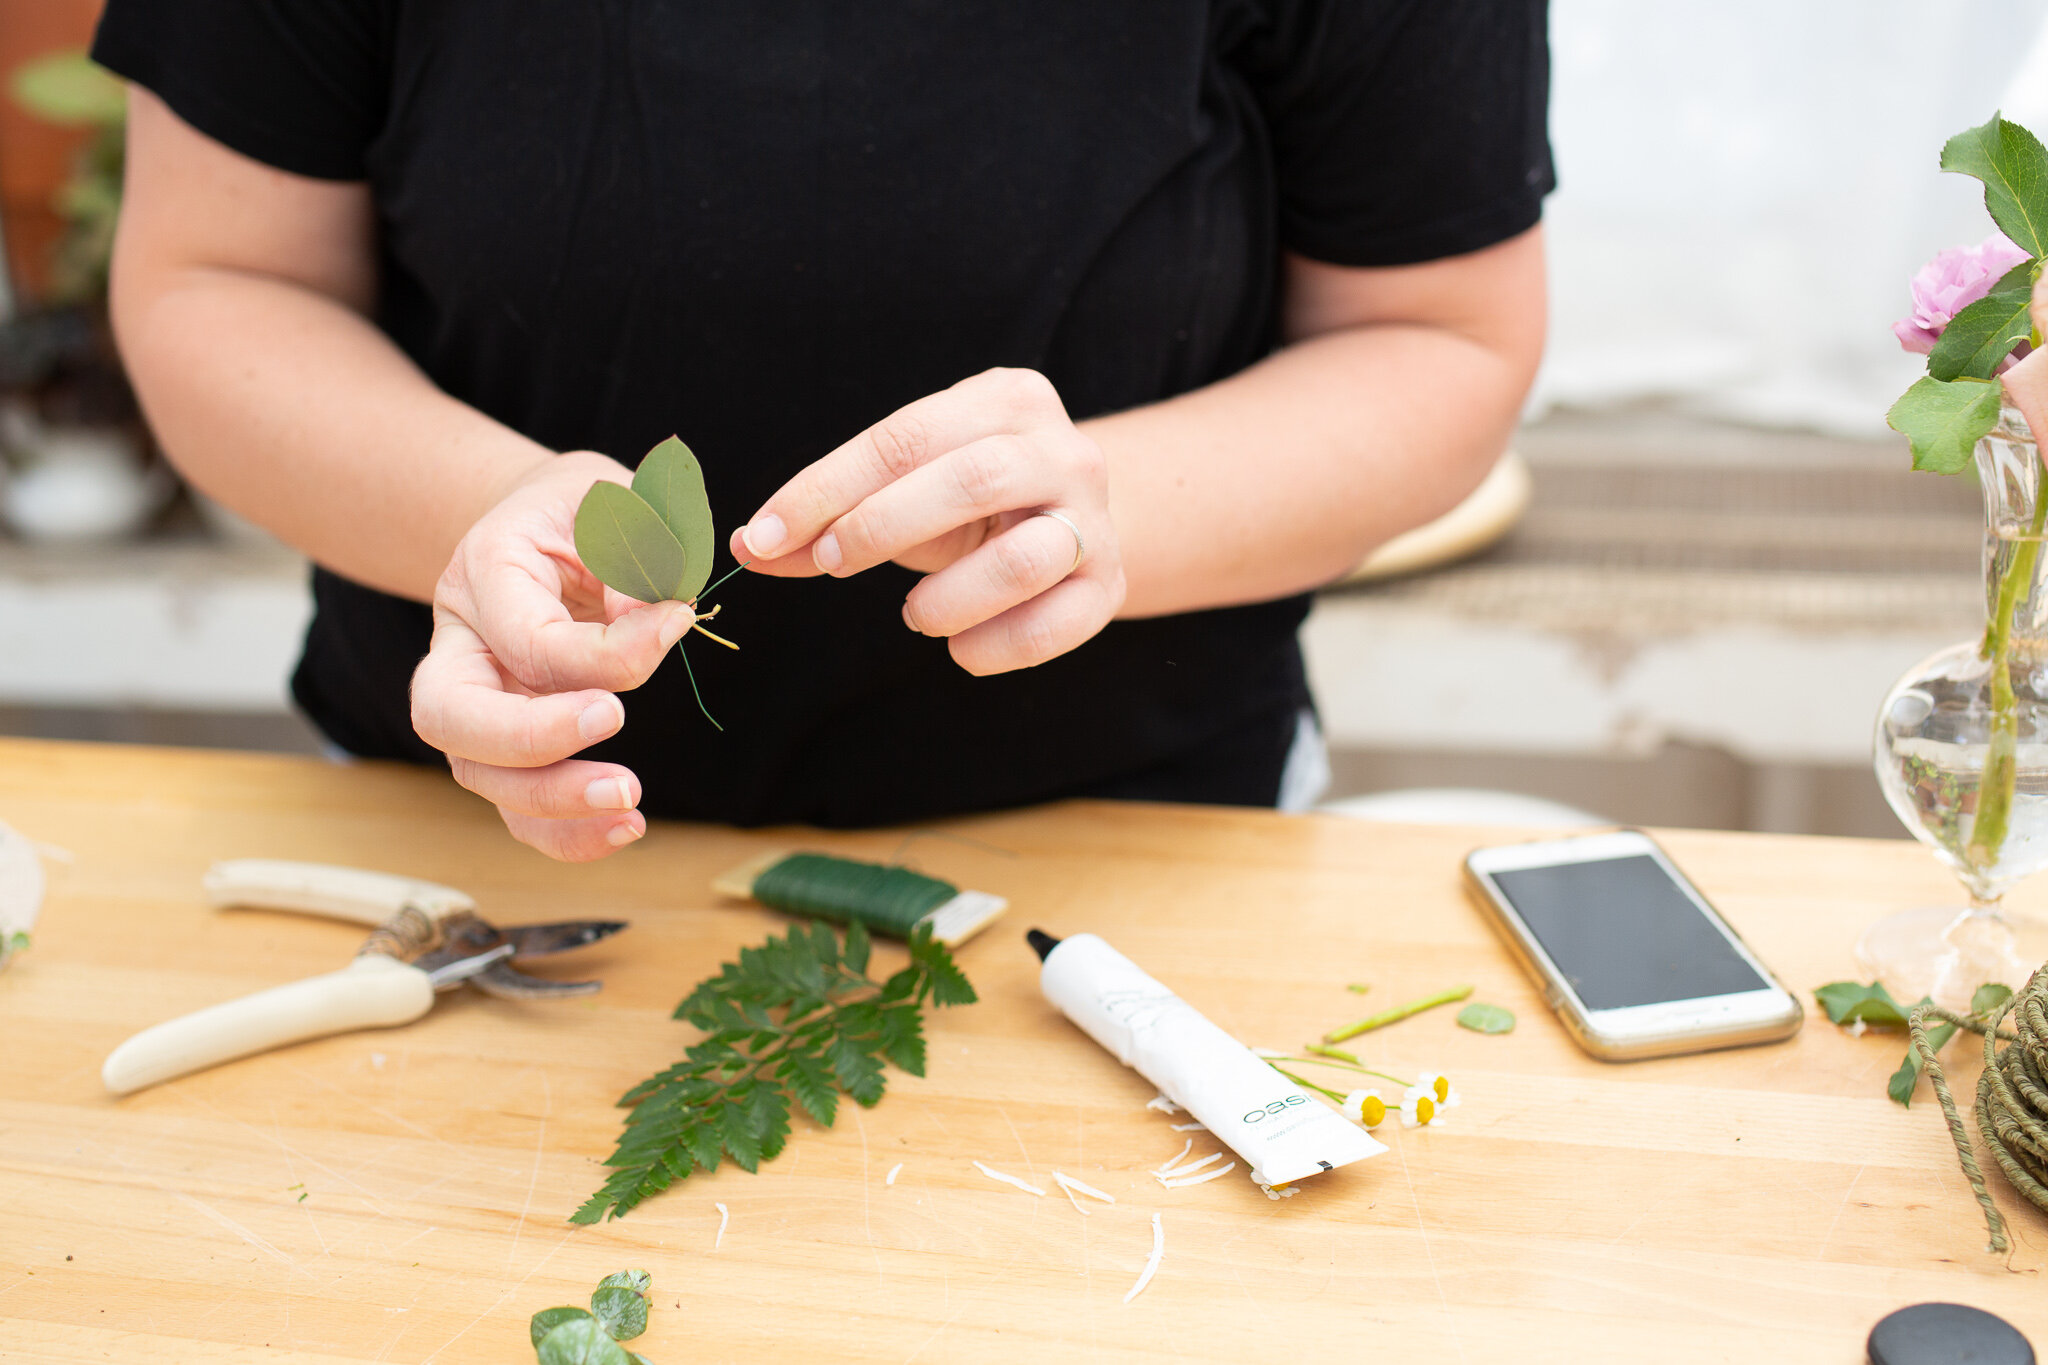
Step 8: Finishing touches. If you want more detail on your hat you can use other filler flowers or smaller leaves from your greenery to create more depth and composition. We’ve used extra eucalyptus leaves, bleached fern, and a few snips from a plant we had in our studio. You can use dried and dyed material that is trending right now, or you can keep it simple (and beautiful) with simple greenery and a few blooms.
|
 |
DIY Floral Hat
 |
 |
*If you want to add in more details we suggest doing it in layers. Use one product through out and then on to another. Layering in components help with the overall design and can help you use less product! Here is where you MAY want to use glue. We are fans of cool glue, or floral adhesive, but it has a bit of a learning curve. You can use any cool fabric glue from your local craft store but beware that it’s a bit on the smelly side and you’re hat may need to air out a bit! Glue is a good option if you want to layer in smaller details that may not be easily wired in.
Leave a comment